|
The Xara Xone Workbook - The best, easy and fun Xara X tutorials |
|
|
|
THE XARA CONFERENCES | XARA.COM | XARA ONLINE | GRAPHICS.COM TOP SITES | ALL WORKBOOKS |
|
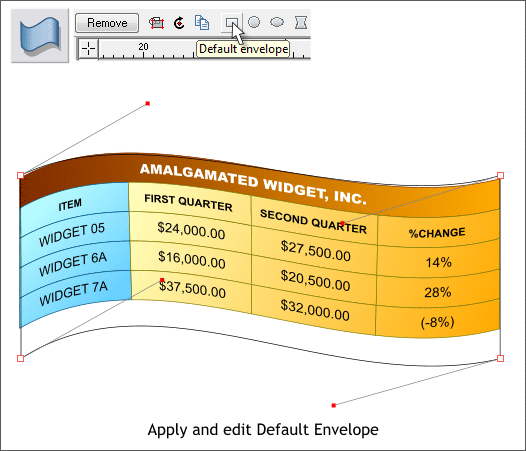
Select the entire table then switch to the Mould Tool (Shift F6). On the Infobar, click the Default Envelope rectangle icon. Click the upper left control point and a line with a small red square (we call these control hangles) will appear. Drag this straight up as shown. Click on the other three corners and drag those red control handles to the positions shown above. This gives our table a light and airy look. Rectangular tables are so boring!
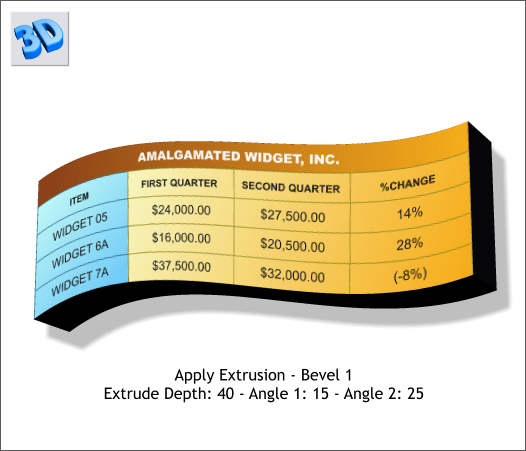
OK. You probably could have enveloped the table in Illustrator. But I really don't think Illustrator can do this next step! Select the Extrude Tool (E). Change the Bevel Size setting on the Infobar to 1. Change the Extrude Depth setting to 40. (If you key in the amount remember to press Enter to apply your changes). From the drop down list of Extrusion Parameters, select Angle 1 and change the setting to 15. From the same drop down list, select Angle 2 and change the setting to 25 . Remember to press Enter after each change if you key in the numbers.
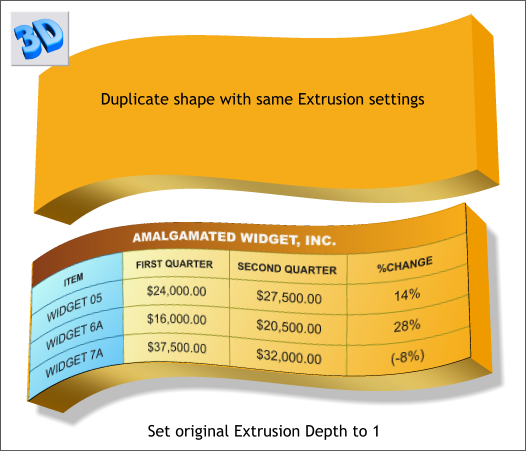
Yours Truly is always out to impress her mentor, Mr. Priester. So she always tries to go the extra yard. You'll notice that the extruded part of the table is black. Black is so funerial don't you agree? Now Ms. Guest went to a lot of trouble and effort to create the colored extrusion above. Then while we were rewarding ourselves with a small celebratory Sherry, a small light bulb went off in our head and we realized there is an easier way. Make a duplicate of the extruded table. Cut the duplicate to the clipboard (Ctrl x). Select the remaining extruded table and click the 3D Extrude Tool button to temporarily remove the extrusion. With the table selected, set the outline to none (select None from the Width drop down box on the Infobar). Press the 3D Extrude Tool button again and you will get a splendidly colorful extrusion. But no outlines! Paste the copy from the clipboard on top (Edit > Paste in Place). Change the Extrude Depth to 1 and press Enter. Center this table over the bottom one. You may want to reduce the size on the Infobar a few clicks. And there you have it. Won't your Xpress using friends be impressed! Click here to send Ms. Guest your comments and questions.
|
||||||
|
|
||||||


