|
The Xara Xone Workbook - The best, easy and fun Xara X tutorials |
|
|
|
THE XARA CONFERENCES | XARA.COM | XARA ONLINE | GRAPHICS.COM TOP SITES | ALL WORKBOOKS |
|
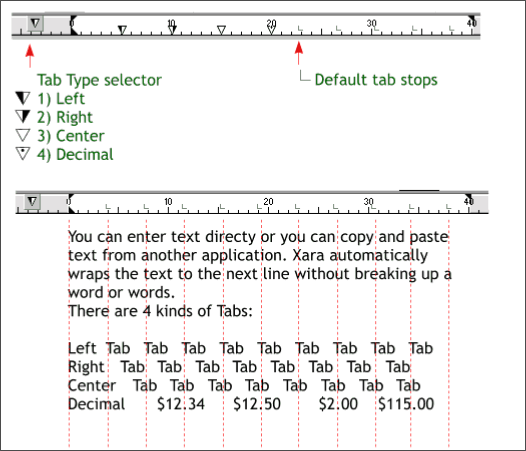
Ms. Guest borrowed the above from Mr. Priester's Workbook 54 (no need to reinvent the wheel as they say). This is a quick review of how the Tabs functions work. When you create a text area (a rectangle you draw with the Text Tool) the screen rulers change (press Ctrl L to display screen rulers) to show the width of the text area and to provide the option to set indents and add tab stops. Those little L things are default Tab stops. To the left of the text area ruler is a small icon with a black and white triangle. Click this icon to select the type of tab you wish to place. There are tab options; Left, Right, Centered, and Decimal. Each time you click the icon, the triangle changes to indicate the select tab type. If the black half of the triangle is on the left side, the left align tab is selected. See the chart above. To place a tab or tabs, select the type of tab (left, right, centered, decimal) by clicking the tab icon until the desired tab is enabled, then click on the ruler to place the tab. You can drag the tabs in either direction. Drag a tab off the ruler to remove it. OK That's Tabs 101. Onward.
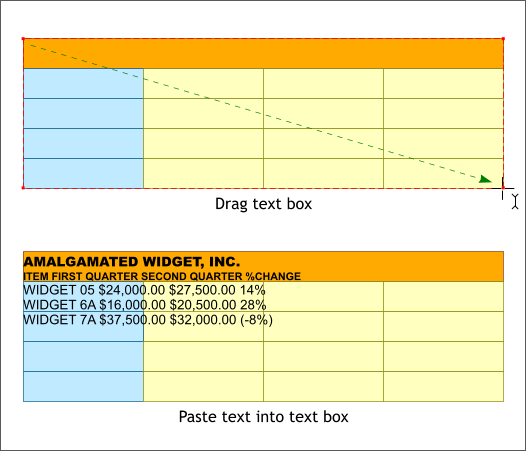
Copy the formatted text to the clipboard (Ctrl c). Select the Text Tool (T). Click in the upper left hand corner of the cells and drag a text area box that extends to the lower right edge of the cells. Look at the picture above dear if you don't understand. Paste the text (Ctrl v) in the Text Area.
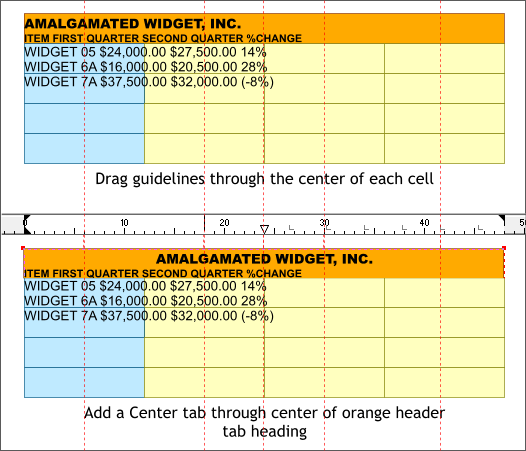
From the left screen ruler, drag guidelines through the center of each of the cell columns and the top header cell (orange). If you select all the cells, then switch to the Rectangle Tool (m ) a small X will appear in the center of each cell. Drag your guideline though the small X. Click the Tab Type Selector until the triangle icon changes to a white triangle (Center align tab). Click a tab in the center of the orange header. Click the Text Tool cursor to the left of the A in the AMALGAMATED WIDGET text and press the Tab key on your keyboard one time. The heading should be centered in the orange cell. Wasn't that fun?
|
||||||
|
|
||||||


