
|
||
|
|
|
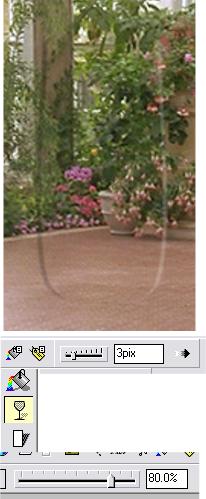
Go to the "feather slider" and adjust the feather until it has almost disappeared. I can't give an exact quantity here as it depends on the size of your shape. Now select the Transparency Tool and set the transparency until the shape is barely visible. I've used 80%, but the amount is up to you. Now lets do the same to the right hand side: A quick way to do this is to select the left hand side, and copy to clipboard. (Ctrl c). Now select the right hand side and Edit > Paste Attributes. (Ctrl Shift a). This gives this right hand shape all the attributes of the left hand shape: Line Colour (none), Fill Colour (black), Feather (3) and transparency (80%). Now just left click on the white square in the screen palette. You should now have the glass shape looking similar to the screen grab left.
|
|
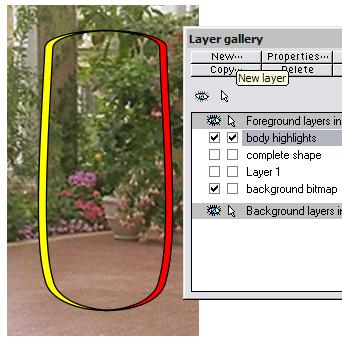
Let's create the rim. Open the layers gallery, return to Layer 1, make it visible and editable, and select the ellipse that creates the rim. Ctrl c copy it to the clipboard. Now make this layer invisible and non-editable again. Create a new layer and name this "Rim" Ensure all other layers are non-editable and that only "Background bitmap" & "Body highlights" are visible and that you have the "rim" layer selected. Paste (Ctrl Shift v) a copy of the ellipse into "rim", as shown left. You should now have the glass shape looking similar to the screen grab left. |
|
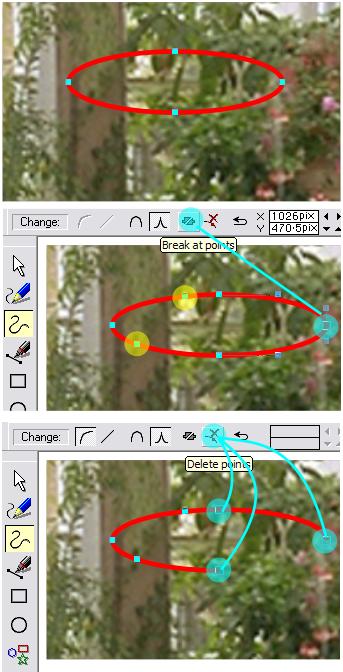
Arrange > Convert to Editable Shapes. (It's no longer regarded by Xara as an "ellipse" but as a "shape"). Look again at your depressingly empty glass. The rim is made up of several light and dark arc's. Let's create these. Firstly re-select the rim and Ctrl c it so you've got a copy on the clipboard. Now select the Shape Editor Tool. We only want to retain a small arc of this original ellipse. Start by adding points. You can do this by moving the Shape Editor Tool across the shape, as it meets the line it changes from a "squiggly" line to an "arrow". Click. Add 2 points (highlighted here in yellow). Now select the node (point) highlighted in blue. Hit the Break at Points icon. Hit the Delete Points icon. Shift-Select the next 3 points (highlighted in blue) and hit Delete Points icon
|
|
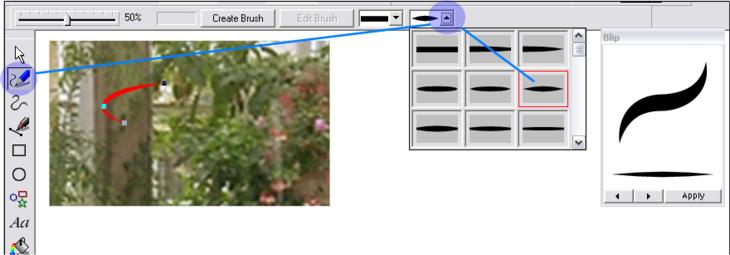
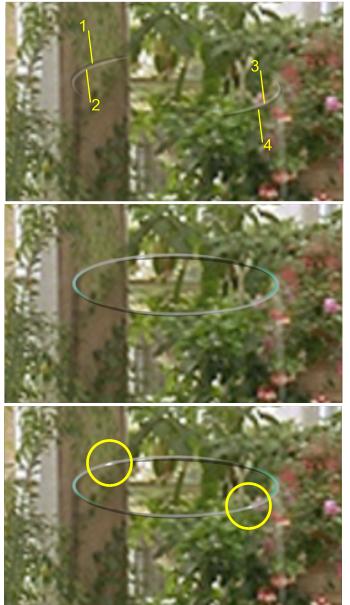
Set to line width to a larger amount, say 4 pt. See Below: Select the Freehand and Brush Tool. Now apply a Blip stroke Change this line into a shape: NB Transparencies work better on shapes than lines. From the Arrange menu, select Convert Line to Shape. |
 |
|
This gives you 1 as in the screen grab left. Ctrl k to clone this shape. Change the fill to white. This gives you 2 as in the screen grab left. Select both of these shapes, Ctrl k to clone them. Flip horizontally. Flip vertically. Move down and right to meet other edge. This gives you 3 & 4 as in the screen grab above left. Continue creating several arcs using the above method, (remembering you have the original ellipse on the clipboard), slowly building up the rim shapes. By adding arcs with a fill colour other than black or white you can add greater realism. Here I've included a bluish green arc on each side. This colour of course will be dependent on the ambient light colour of surrounding reflective surfaces. Finally to add the finishing touch to the rim, look again at your still depressingly empty glass. Notice how at some point on either side there is normally a very bright white highlight area, where the light hits the rim directly. Create these by adding small shapes with a white fill and a feather but NO transparency. |
|
 Your screen should now look
similar to this screen grab left.
Your screen should now look
similar to this screen grab left.
 Now select the left hand shape and set the line
colour to none and the fill colour to black.
Now select the left hand shape and set the line
colour to none and the fill colour to black.
 There's more shading to add to the body but let's
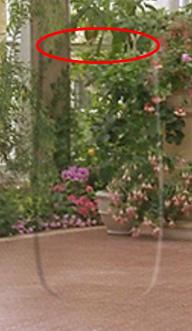
leave that till later. Look again at your empty glass laying forlornly alongside your computer. Notice that that whilst the sides may be almost invisible the rim is by comparison quite distinct.
There's more shading to add to the body but let's
leave that till later. Look again at your empty glass laying forlornly alongside your computer. Notice that that whilst the sides may be almost invisible the rim is by comparison quite distinct.
 Select this ellipse. As an ellipse we can't really edit it
a great deal so:
Select this ellipse. As an ellipse we can't really edit it
a great deal so:
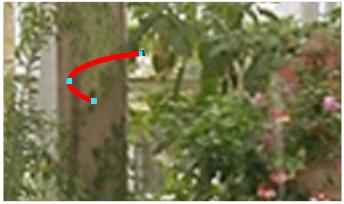 Hopefully you should now be left with the arc as shown left.
 Set the fill colour to black, line colour to none.