
|
||
|
|
|
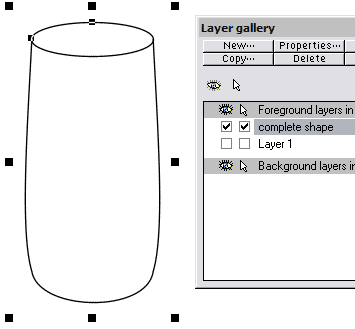
It's glass shaped but it doesn't look "real" Edit > Select All (Ctrl a) Edit > Copy (Ctrl c) Open the Layers Gallery. Select New... Name this layer "Complete shape" Press Ctrl Shift V to paste a copy on the new layer directly above the original on the layer below. Make Layer 1 invisible & non-edible . |
|
I recommend using layers for this project as it uses a considerable amount of transparencies and feathering and it can soon become difficult to select individual shapes. Similarly try to use meaningful names for the layers such that it's easy to identify individual parts of the glass. Next I want to join these 2 shapes so they become one shape. I can't at the moment as one is a shape and one is a line.
|
|
|
|
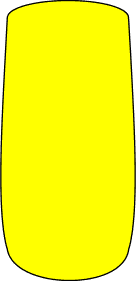
Edit > Select All (Ctrl a) Arrange > Combine Shapes > Add Shapes (Ctrl 1) You should now end up with a shape similar to that on the left. (filled yellow here to highlight the joined shape) Select this shape and make a copy to the clip board (Ctrl c) Open the Layers Gallery and add a new layer, naming it "Body highlights". Make all the other layers invisible & non-editable. |
|
 I would suggest that before you continue any
further that you raid your drinks cabinet and return with an empty clear glass. Plonk this next to your computer and spend some time studying the effect of the light on the glass. Move it, or the light
source, about and notice how the shading changes. We want to be able to reproduce this effect using vector shapes.
I would suggest that before you continue any
further that you raid your drinks cabinet and return with an empty clear glass. Plonk this next to your computer and spend some time studying the effect of the light on the glass. Move it, or the light
source, about and notice how the shading changes. We want to be able to reproduce this effect using vector shapes.
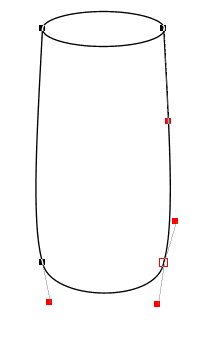 You should end up with a shape similar to that on
the left.
You should end up with a shape similar to that on
the left.
 It should look like the screen grab left.
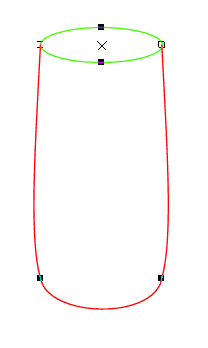
 The "body" is only a line at present, so using the
Shape Editor Tool, select one of the ends (highlighted green here) and click-drag out a line extension towards the other end. Once you get towards the other end point the cursor changes to a little plus (+
) sign. Release and this will change the line from a line to a shape.
The "body" is only a line at present, so using the
Shape Editor Tool, select one of the ends (highlighted green here) and click-drag out a line extension towards the other end. Once you get towards the other end point the cursor changes to a little plus (+
) sign. Release and this will change the line from a line to a shape.
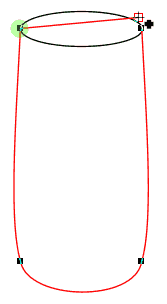
 Now I want to join the body shape and the top ellipse.