|
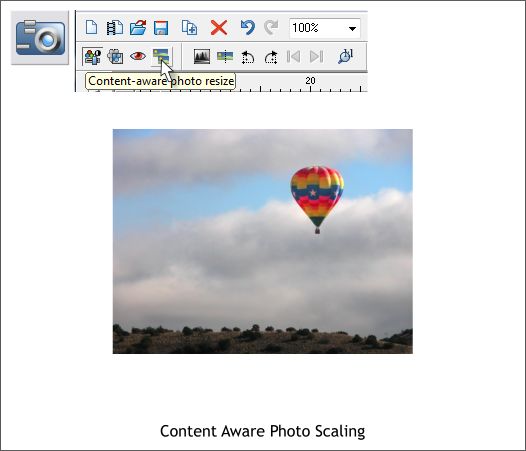
There are several new additions to the Photo Tool. The most impressive is Content Aware Photo Scaling. As you can see above on the section of the Photo Tool Infobar, there are also new left and right rotate photo icons and a
1:1 icon that will be covered later.
Content Aware Photo Scaling lets you expand a photo without distorting a key part of the photo. This does not work with all photos. But in the case of the photo above it works to perfection.
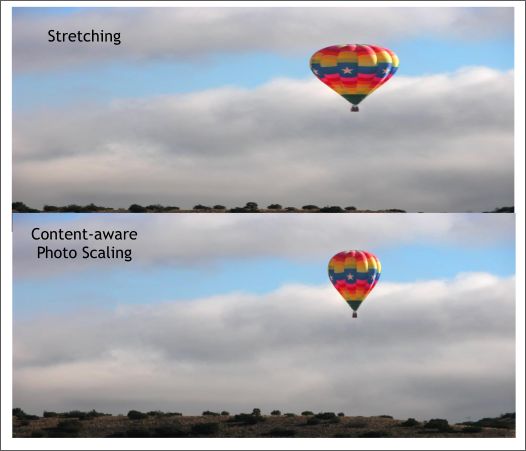
Let’s say that you need a wider photo but you want the balloon to be the same size. You could select the photo and stretch it horizontally, but as you
can see in the top example, the balloon becomes visibly distorted. Scaling the image with Content Aware Scaling results in a more believable image as you can see in the bottom example.
How does it do that you ask? As well you might. Content Aware Scaling examines the image and determines if there is an obvious object, in this case
the balloon. So it protects the balloon but allows the rest of the image to be stretched.
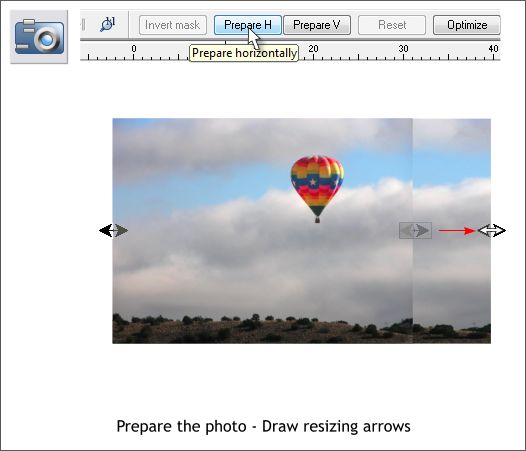
Here’s how it works. You select the photo with the Photo Tool and click the Content Aware Scaling icon shown in the previous illustration. An annoying
dialog appears telling you something. I can’t remember because I checked the box that said DON’T SHOW ME THIS STUPID DIALOG AGAIN! After you close the dialog the Infobar displays a Prepare H
and Prepare V button. As you more clever readers have already deduced, this refers to Horizontal or Vertical stretching. Click Prepare H. Xara does a quick analysis of the photo and
determines that it is the balloon you want to preserve. After all, what else is there to protect? That’s what makes this such a good candidate for this procedure.
When the arrows appear on either side, simply drag them to extend the image.
Conversely you can drag inwards, but only so far and after a small amount of dragging even the balloon gets squished some.
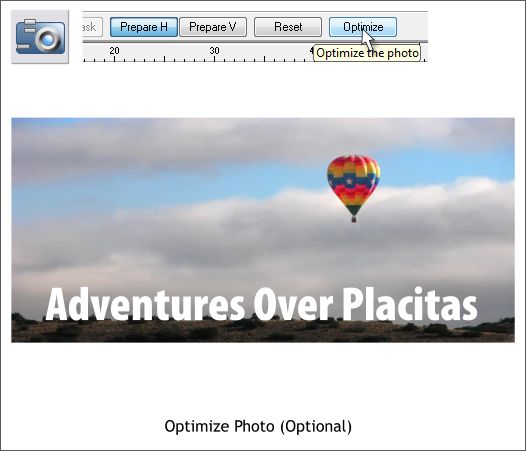
The final edits remain with the image as long as the image remains in the document. This is fine if at some point in time you wish to press Compare ton the Photo Tool Infobar to remove the effect. But you may decide that this is
exactly how you want the image to look and do not plan to ever change it again. That’s cool. Just press Optimize and set the size, color depth, etc. for the image.
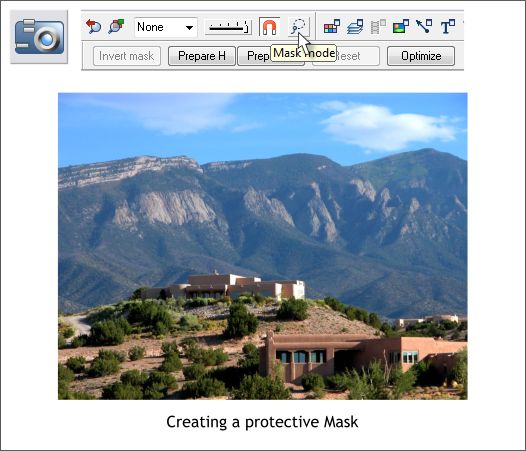
The Mask Tool There may be times when you want to stretch an image such as the one above where the object to be protected is not so obvious. In this case you can use the new Mask Tool
to mask an area. It appears on the Infobar right next to the Snap to Objects magnet icon and is identified in the illustration above.
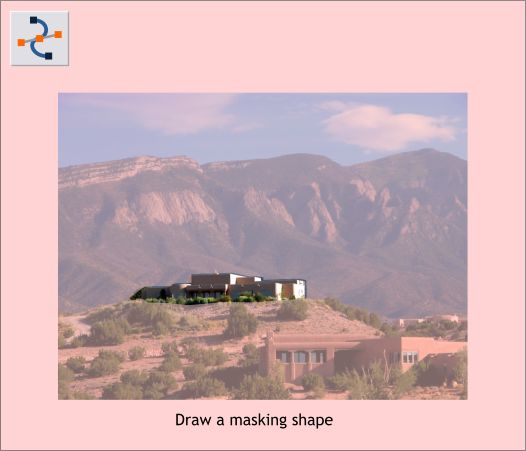
When you click the Mask Mode icon, the entire screen is filled with a pink layer. This represents the mask. At this point, everything is protected.
Let’s say that we wish only to protect the house on top of the hill from distorting when we use Content Aware Scaling. The easiest way to protect
the house is to create a horizontal rectangle that covers the house and a bit of the area around the house, and that will work fine. Or, you can draw a more precise shape (as I have above), using the
Freehand and Brush Tool (N or F3), or my tool of choice, the Shape Editor Tool (F4). When the shape is completed, the entire shape is removed from the pink mask.
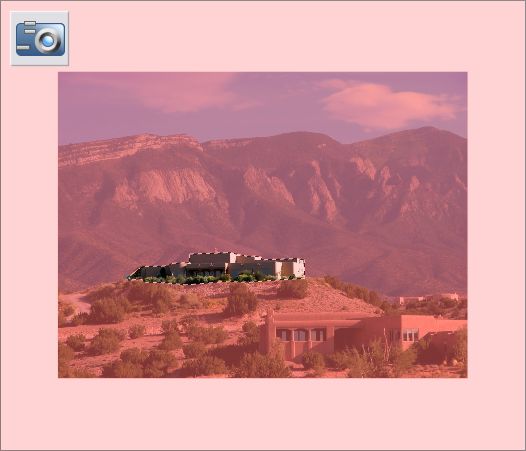
The image above shows the completed mask outlined by what is called the “marching ants”, an animated dashed outline.
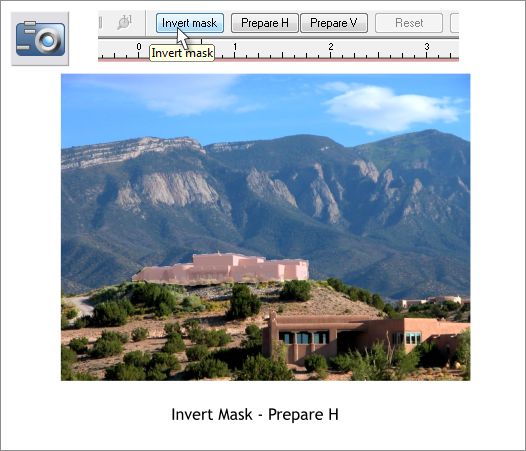
In order to protect just the masked area, we need to invert the mask, so that just the house will be protected by the pink mask. To do this, click the Invert Mask button shown above.
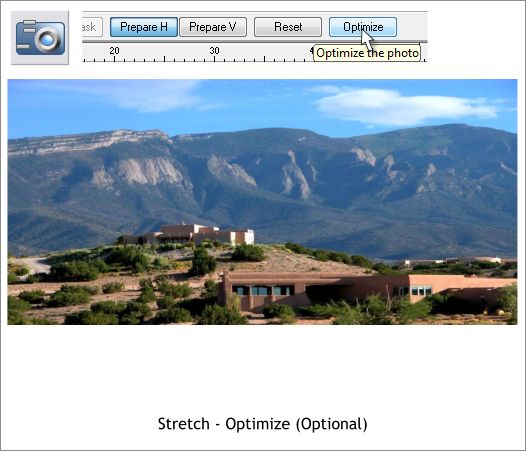
Click Prepare H (or V if you want to stretch the image vertically), and stretch the image as desired. Optimize the image if you do not intend to do further
edits at a later date. Remember, the Content Aware Resizing is a “live effect” and remains live unless you make the effect permanent by optimizing
the image, or if you export the image as a bitmap. So if a day from now, or a year from now, or a decade from now, should you wish to restore the image or edit the amount of stretching, you will be able to do so.
New Photo Tool Additions
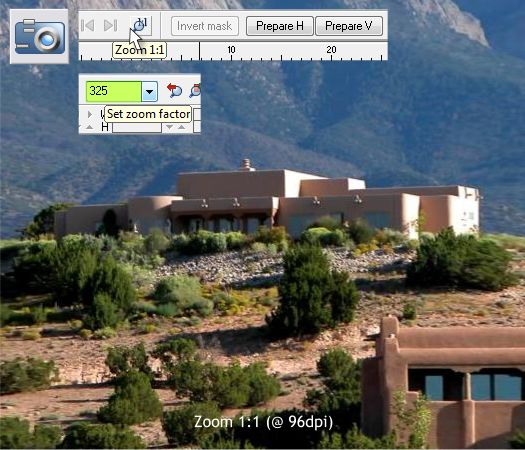
Often times you will be working with a photo that has been resized and may be at a higher resolution, for example, a digital photo at 300dpi. In Photoshop you can select View Actual Pixels
which displays the image at 96dpi or 1:1 ratio. You can zoom to this view in Xtreme 5 in Photo Tool mode simply by pressing the Zoom 1:1 icon shown above. The image remains the same size
but Xtreme zooms in to display the image at 1:1 ratio which in the case of the image above, is 325 X.
This brings up a good point, even if your image is going to be displayed on a website at Windows screen resolution, 96dpi, it is good to do Content Aware Scaling
at a higher resolution to preserve as much detail as possible. Then you can always Optimize the image back to 96dpi.
I don’t think I need to explain the Rotate Left and Rotate Right icons. But if you need clarification for these icons, let me know and I’ll send you a full explanation.
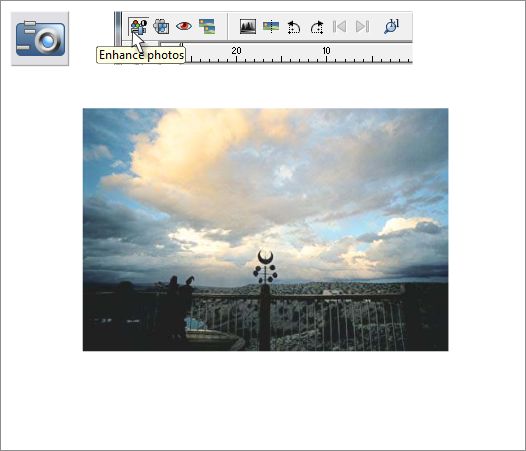
There is another addition which is found in the Photo Tool > Enhance Photos editing mode. The cloudy sky image above to your editor’s keen eye looks just
about right. But you might not agree. You might want it to be warmer (more towards orange), or cooler (more towards blue).
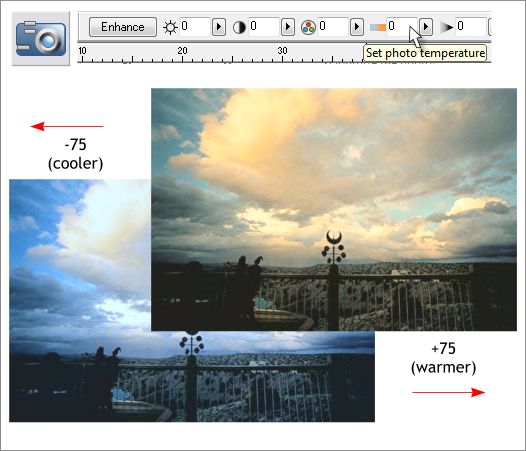
There is a new slider shown above, Set Photo Temperature makes an image warmer or cooler. By moving the slider left or right you can make the image
more blue or more yellow - orange. I have used a dramatic shift to highlight the difference. Smaller shifts should usually suffice.
|