|
Here is a summary of some of the key new features.
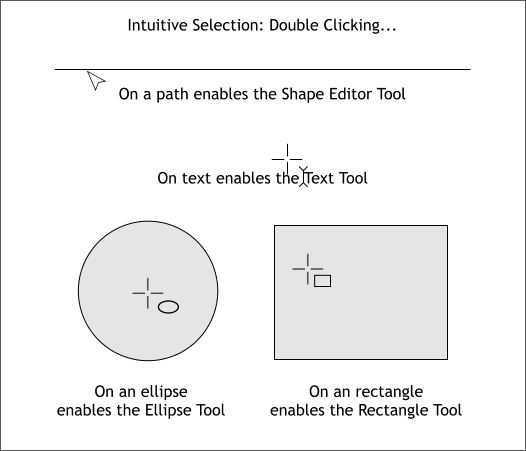
Intuitive Selection Many power users rely on keyboard shortcuts, such as F4 for the Shape Editor Tool or T to select the Text Tool. And while these
commands still work (in most cases, but in some cases have been changed), now there is a more intuitive way to select certain tools. Your editor calls this Intuitive Selection. Here’s why.
Double click on almost any object with the Selector Tool (the arrow pointer) to enable a tool related to that particular object. For example, double click on a path or outline to automatically enable the
Shape Editor Tool. Double click on a text object or text area to enable the Text Tool (or press T). Double Click on a rectangle or an ellipse to enable the Rectangle or the
Ellipse Tool. But wait. There’s more.
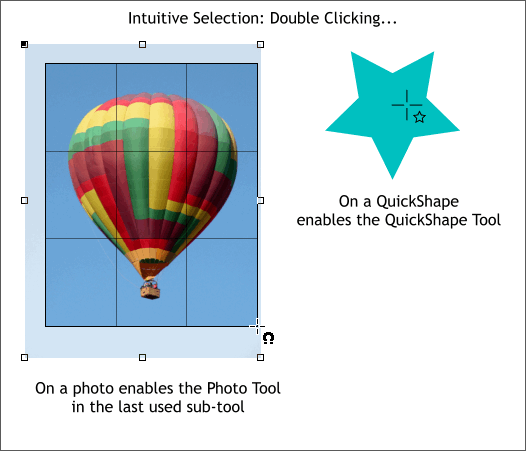
Double click on a photo with the Selector Tool and picture this, you get the Photo Tool. In the last used sub-tool, which in this case was the clipping tool
. And as you might expect, double click on a QuickShape and you get the QuickShape Tool.
Some things do not work quite as you might expect. Double click on a gradient filled rectangle and instead of the Fill Tool, you get the Rectangle Tool
unless the rectangle has been converted to editable shapes, in which case you get the Shape Editor Tool. Experiment. You cannot break any object by double clicking upon it, and you might even be surprised.
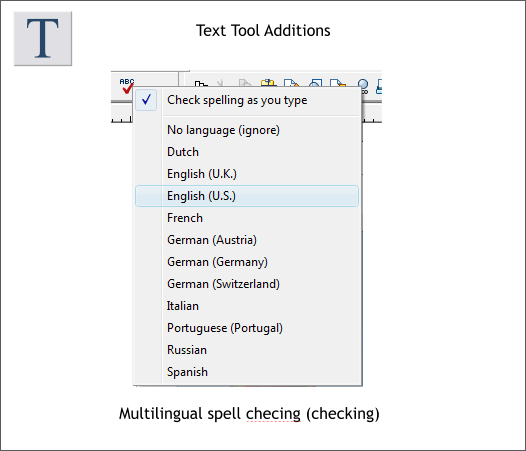
Text Tool Additions Spell checking has been added to Xtreme 5 in eight languages with three variations. If you enable Check spelling as you type,
misspelled words appear with a red dashed underline as shown in the caption above. Right click on the flagged word to see a list of suggestions or to Add the word to your personal dictionary.
Your editor cannot tell you just how grateful he is. And since one person’s color is another person’s colour, in some cases, you can check your spelling
according to your particular country’s language.
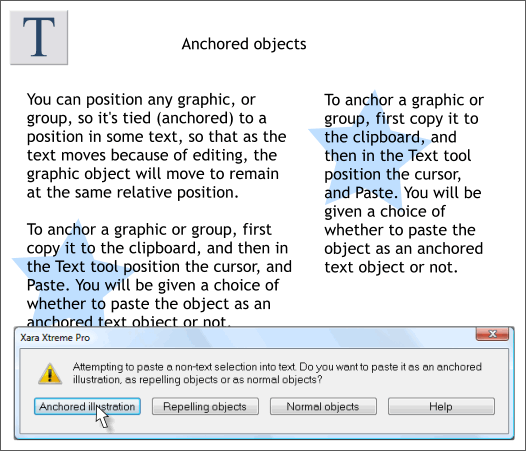
Anchored Objects Now you can embed graphics in the text or alongside the text. Well, sort of. If you embed an object in the text, such as the star in the
examples above, the star retains its position in the text, even if the text is edited or if the text area is resized. But not if the object is set to Repel text.
It is currently either or, not both. I hope this changes in a future release so you can embed an object that also repels the text. But it is definitely a step in the right direction.
It works like this. Copy the object you wish to embed to the Clipboard, insert the Text Tool cursor in the text (remember, now you can double click on the text with the Selector Tool to enable the
Text Tool), where the object is to be embedded, and paste (Ctrl v). A dialog appears with the option to Anchor the object to the text, to Repel the text, or as a Normal
object, which does not embed or repel the text but simply pastes the selection. (If this is confusing, press the fourth button).
Once you have embedded an object in the text, you can move the embedded object, for example to the left of the text block, and the object will retain that position.
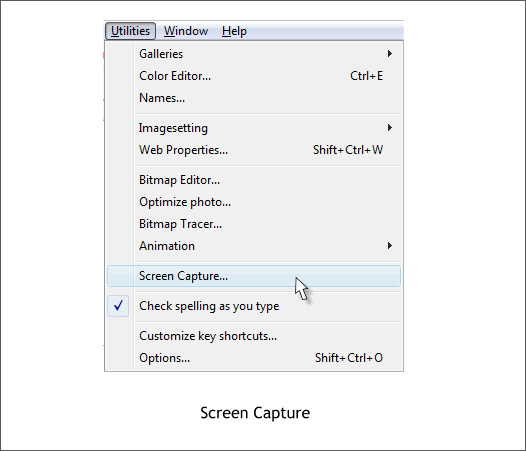
Screen Capture Over the years your editor (moi) has built up an extensive library of handmade vector buttons, cursors, dialogs, and so forth, which he
uses to painstakingly recreate screen captures. In recent years, succumbing to slovenliness, your editor has resorted to using Window’s Print Screen to
create screen images such as the menu shown above (with added vector arrow pointer, complete with attractive and stylish drop shadow). But now there is an even better way.
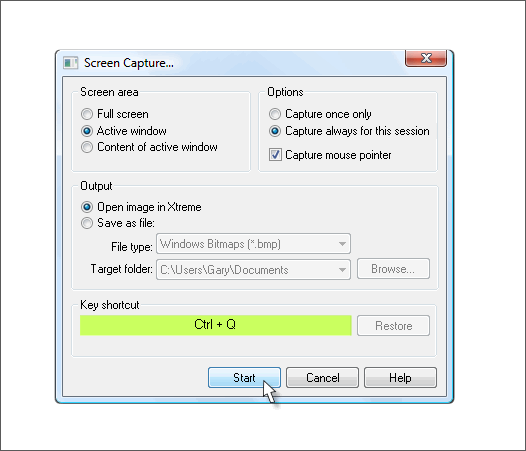
Select Screen Capture from the Utilities menu and the dialog shown above opens offering several options including Capture Mouse Pointer so your
editor can now retire his handmade simulated mouse pointer. Although we will still need to manually highlight important things such as the keyboard
command to initiate the screen capture. At present, you have to select Screen Capture every time you open a Xtreme window and press Start to
enable the screen capture utility. A spot of bother, no question, but well worth the end benefits and convenience. However, simply pressing Ctrl Q any
time to capture the screen according to the last settings and without going through the Utilities menu first would be ideal.
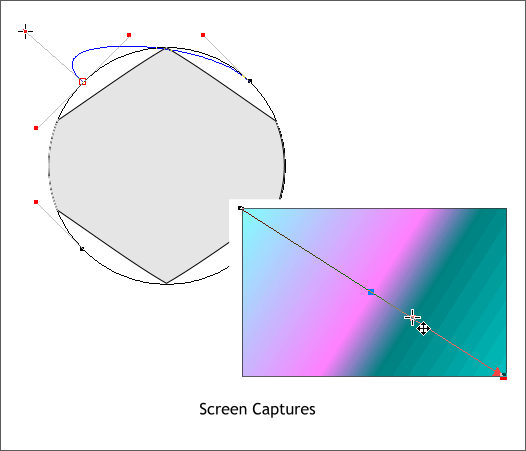
Shown above are but two examples of screen captures and their accompanying mouse pointers.
Continued on the next page.
|