|
|
|
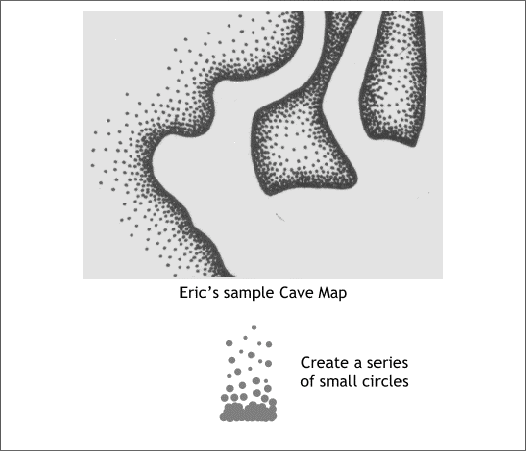
Eric (EJ) in the Xara X Conference wrote: "I draw cave maps and want to prepare a brush that can produce the effect shown in the graphic. The dots should be on one side but if they have to be on both then that is OK, I can mask them, though its a hassle. I have tried to make various brushes already but they are not right. Any help would be appreciated." To the rescue came Egg Bramhill (also another Eric—these Erics must stick together). Egg created a simple brush made up of circles that when applied to a path, creates a very similar effect. I'll highlight some of the details of Egg's Cave Brush.
In the illustration above Eric's sample bitmap is on top that he attached with his post. The diminishing dots create a feeling of depth. The dots in the bitmap were probably created one at a time with an ink pen. The technique is called stippling. On the bottom of the above illustration is Egg's brush, spaced out and enlarged so you can see the pattern of circles.
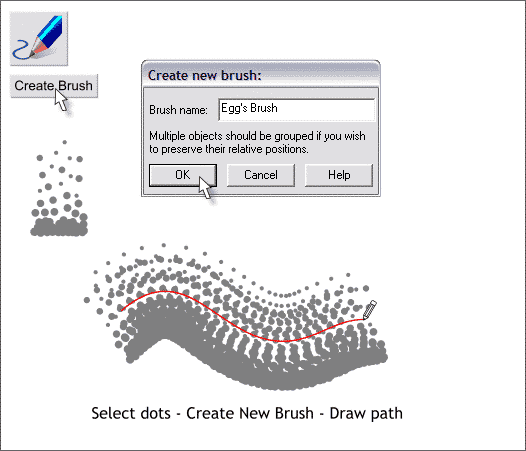
Create the circles for the brush and group them (Ctrl g). Select the grouped circles then select the Freehand and Brush Tool. On the Infobar, click Create Brush. Name your brush and press OK. Draw a line with the Freehand and Brush Tool. The new brush stroke will be applied to the new line. While the effect is OK, the repeating pattern is too static. It should look more random like the stippled image in Eric's original bitmap example.
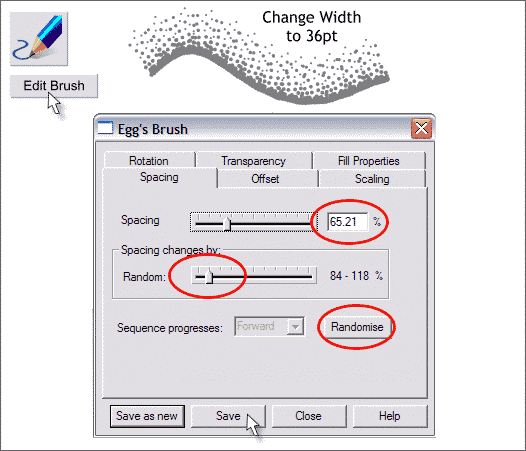
Change the line Width to 36pt which also reduces the size of the brush. With the line and the Freehand and Fill Tool selected, click Edit Brush. Modify the Spacing setting until it looks correct. Move the Random slider a tick to the right. Press Randomize repeatedly until the brush strokes look more random. Press Save to save these attributes.
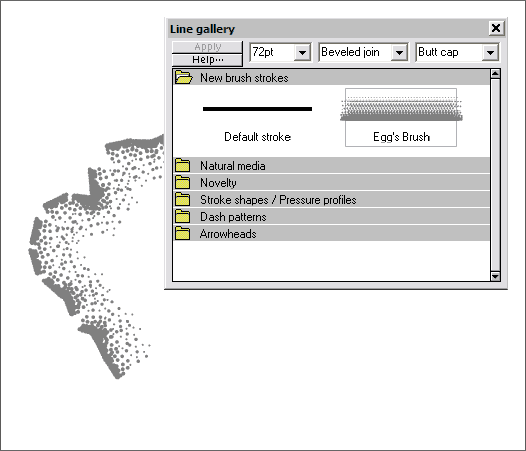
You can now create your cave outline (this could be an antique map as well). Open the Line Gallery (F12). Select the brush shape, and press Apply. The brush shape is breaking up so we will need to reedit the brush.
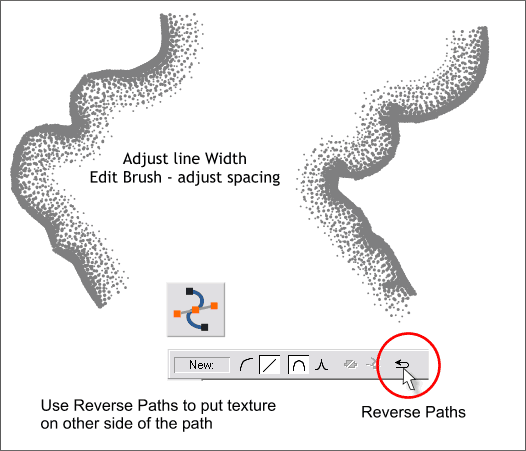
In the example above the brush width and spacing have been modified. But the pattern is on the wrong side of the outline. Select the line with the Selector Tool (F2) and then switch to the Shape Editor Tool (F4). Press the Reverse Paths icon on the Infobar and now the texture is on the correct side of the path. (This works with any brush stroke).
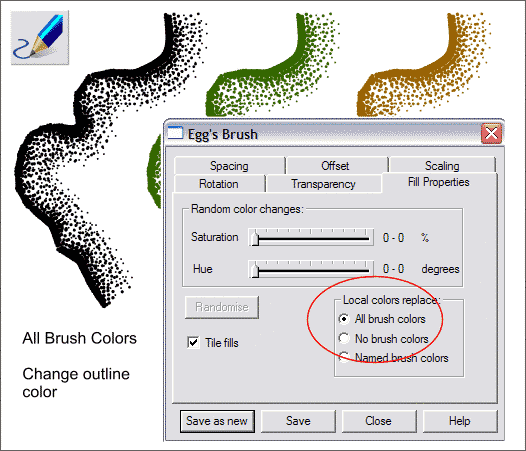
Finally, you can change the color of the brush shape by editing the Fill Properties. In the Local Colors Replace: section, check All Brush Colors. Now right click on any color on the screen palette to change the outline color and subsequently, the brush color as well.
|
||
|
|


