|
We will now create a new brush which will make a string of lively holiday lights.
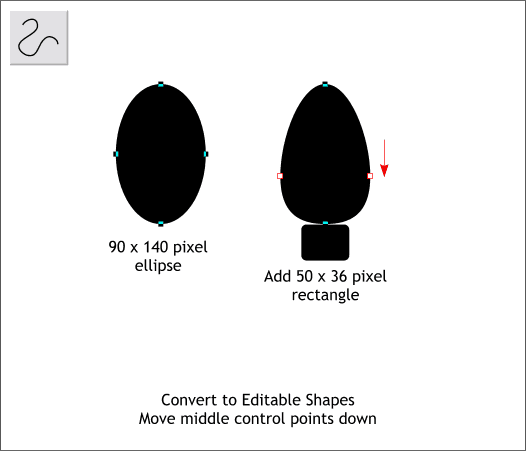
Using the Ellipse Tool, draw an ellipse to the size shown above left. With the ellipse selected, select Convert to Editable Shapes from the Arrange menu. Select the Shape Editor Tool
and select the center two control handles (shown in the red outline to indicate a selection) and drag the points downward (or use the arrow keys). Add a small rectangle under the ellipse and press the Curved Corners icon (the arc icon) on the Rectangle Tool Infobar.
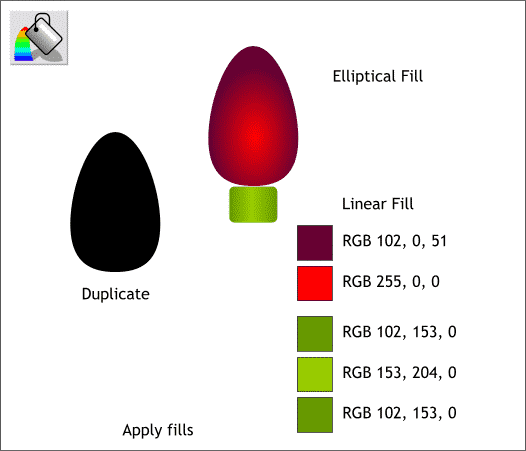
Make a duplicate (Ctrl d) of the light shape and set it to one side. Apply an Elliptical fill to the bulb using the two colors shown above. Apply a horizontal Linear
fill to the base. Double click on the fill path arrow to add an additional color to the fill path arrow.
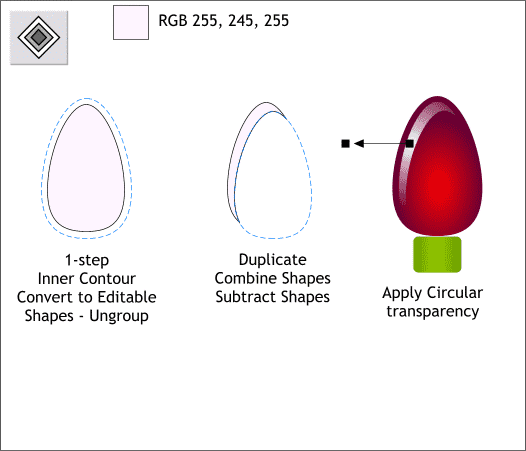
Select the duplicate shape with the Contour Tool. Drag towards the center a small amount. Change the number of Contour Steps to 1 and press Enter to apply the change. Convert to Editable Shapes
(Arrange menu) and ungroup (Ctrl u) the two shapes. Delete the larger shape.
Clone the remaining shape (Ctrl k) and move the clone down and to the right. Select both shapes and Arrange > Combine Shapes... Subtract Shapes.
Drag the remaining shape over to the red-filled light shape. Select the shape with the Transparency Tool. Apply a Circular transparency and drag the center of the transparency to the center of the highlight shape.
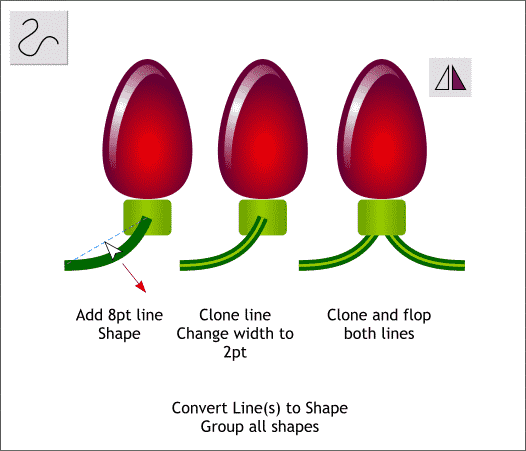
Using the Shape Editor Tool. draw a diagonal line (click the start and end points) from the center of the bulb socket to the left. Drag the line into a graceful curve. Change the line width to 8pt (select from the Width drop down
list) and right click on a dark green color on the on-screen color palette to change the outline color. Clone the line (Ctrl k), change the line width to 2pt
and the color to a brighter green. Select both lines and clone them. Press the Flip Horizontal icon on the Infobar and move the flopped lines to the right. Select all four lines and send to back (Ctrl b
). With the lines still selected, Arrange > Convert Line to Shape. Group all the objects (Ctrl g).
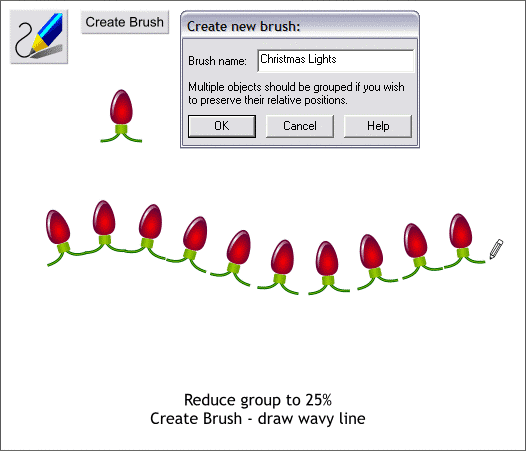
Reduce the size of the group. Select the group with the Freehand and Brush Tool and press the Create Brush button. Name the new brush Christmas Lights and press OK to create the new brush. Using the
Freehand and Brush Tool, draw a gentle curve of lights.
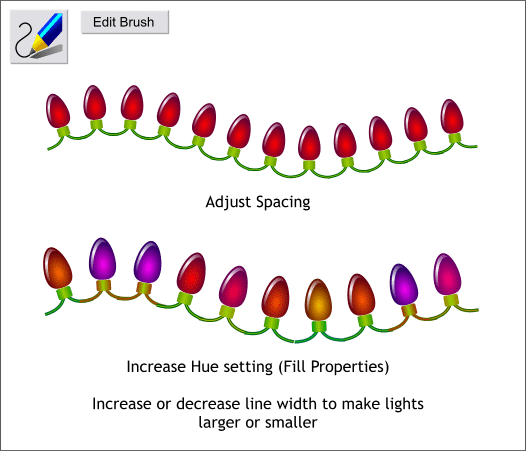
Press Edit Brush and modifying the spacing between the lights. In the Fill Properties tabbed section, move the Hue slider a little to the right. This creates a rainbow of lights. Press Save
to save the changes to the brush and close the Edit Brush dialog. Once again, the larger the line Width, the larger the lights.
|

