|
|
|
|
|
||||
 |
|||||
Gold and Chrome |
|
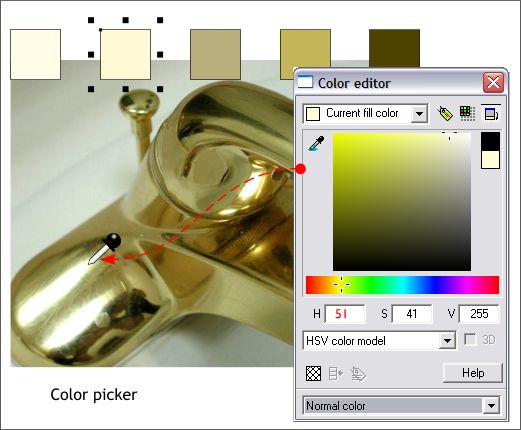
Over the years, I have done literally dozens of tutorials on creating the appearance of gold and chrome and I shall continue this quest for the perfect metal effect here today. If I have learned anything during my experiments with trying to recreate these metallic colors it is this: don't reinvent the wheel. If you have a digital camera, take a photo of a gold, brass, chrome, or silver object and use the Color Editor's color picker (the eyedropper) to sample the colors from the digital photo. (If you have a scanner, you can also scan images from catalogs and magazine ads using the same technique).
Here is my technique. Import the scanned image into Xara. The image shown here is a gold-colored faucet. Notice the range of gold-toned colors. Create a series of squares. Open the Color Editor (Ctrl e ) then select the first square. Drag the color picker (the eyedropper icon) over the lightest portion of the image. In this case I backed off a little creating a very pale yellow. Select the next square and pick a slightly darker color. Repeat this for the other squares until you have a representative range of colors from highlight to dark reflections. Pay attention to the Hue (H) setting. For your colors to be consistent, find a common hue (n the example above it is around 50), and change all the hues to the same numerical value. Now you have a range of gold or brass colored tones.
In the example shown here, I have started with a Saturation (S) setting of 10% and increased it by 30%. The hues of 50 and 55 seem to work best. |
|
Our brain interprets this information to determine the smoothness of a surface. |
|
|
|
The transition between colors is very smooth.
|
|
|
|
A polished steel ball bearing or a mirrored Victorian reflecting ball (as shown above) is a good way to capture the colors in chrome as seen out of doors. Chrome and silver have no color. The color we see is reflected in the surface and in most cases is the sky and the ground. Generally there is an intermediate reflection which in this case is the the house and your editor (that's me with the camera). TIP: You can right click on the reflecting ball image and save it on your computer from where you can import it into Xara or Brian Etherington's XPal (covered on the next page) to create a palette of chrome colors.
Silver we see in ads and brochures is usually photographed in a photographer's studio on a table top. A white sweep is placed under the object and extends behind and up from the object. White reflectors are placed to the left and the right and reflect a soft light source from above. Directly in front of the object is another white card with a hole cut out through which the camera takes the picture. As the back of the studio is dark, the area seen through the opening is also very dark. Next time you see a photograph of a round silver object such as a silver bowl or spoon look at it carefully and see if it does not look something like my illustration above.
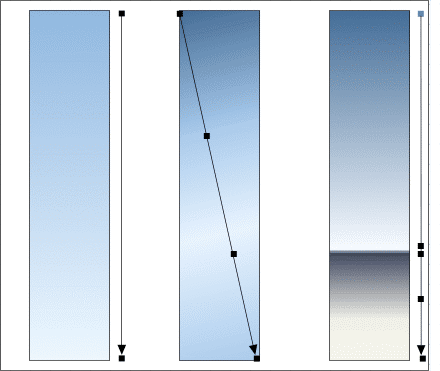
Here are three examples of sky colors reflected on flat chrome surfaces using colors sampled from the reflecting ball. |
|
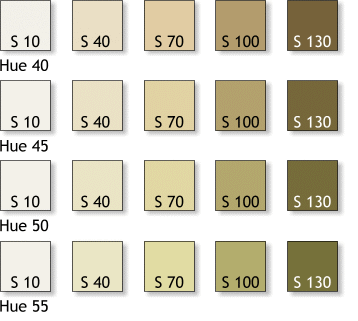 As the Hue values get smaller (moves toward 0 degrees), the colors get warmer. As the value
of the hue increases, the gold tones get cooler, more like brass.
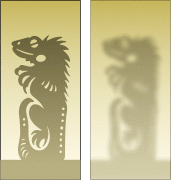 Shiny surfaces, such as gold, brass, chrome, or a mirror, produce very sharp
reflections. Dull surfaces such as burnished gold, or brushed stainless steel, produce diffused, soft and blurred reflections.
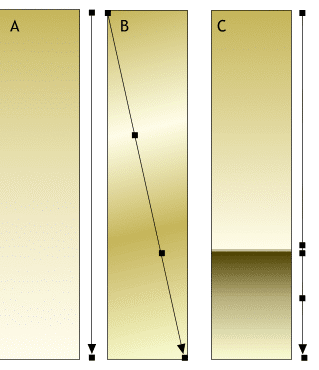 Example A, which has a very smooth gradation, could be either shiny or dull as we do not see any
reflections. Example B is also without reflections but the bands of colors are soft and diffused indicating a soft, dull gold surface. The ground and sky reflection in example C look makes the gold
appear shiny because the delineation between the sky and ground is sharp.
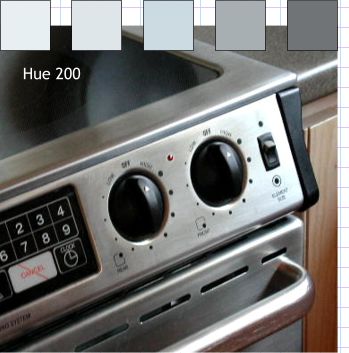 Here is an photo of a brushed stainless steel surface from which I have sampled five colors and given all
five a Hue of 200 degrees.
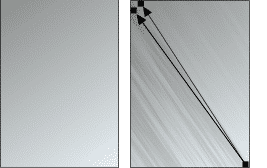 Brushed stainless steel has a grain as the metal has been burnished or brushed with a
steel brush. Using a duplicate of the surface and applying a Fractal Clouds, Darken, Repeat Inverted transparency, and dragging the end control points very close together
creates this grain effect.
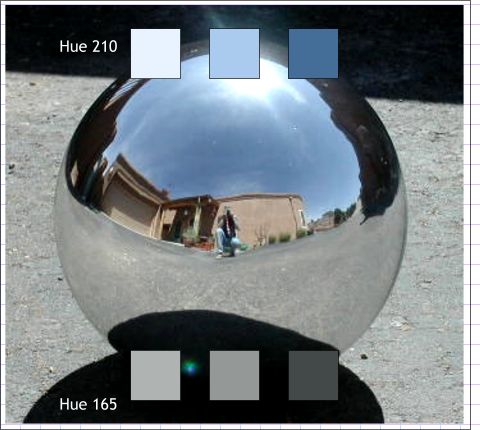
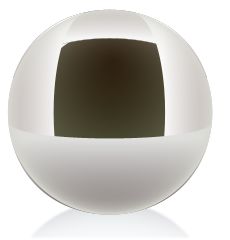 If you see a photograph of a silver sphere in a catalog or magazine advertisement it will probably look
something like this. The colors will be more subtle, almost white, and either skewed towards warmer or cooler grays. In the center of the ball you will probably see a distorted dark rectangular reflection. Why?