 WEBSITE AND WEBSITE GRAPHICS CREATED WITH XARA DESIGNER 6 PRO


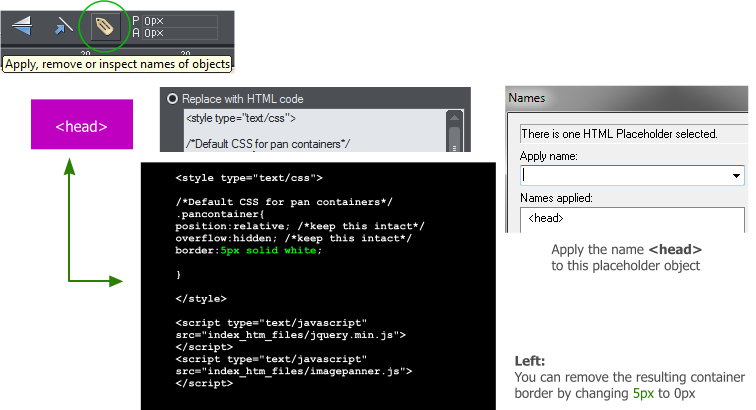 Create a magenta placeholder and add the text <head> and group the
text with the rectangle. With the magenta rectangle selected, click the
Names yellow tag icon on the Infobar. Key in <head> in the Apply
Name: text entry box and press Add. Include the angle brackets <> This
adds the placeholder script to the HEAD portion of the HTML document.
Highlight the text shown below and copy it to the clipboard (Ctrl c).
<style type="text/css">
/*Default CSS for pan containers*/
.pancontainer{
position:relative; /*keep this intact*/
overflow:hidden; /*keep this intact*/
border:5px solid white;
}
</style>
<script type="text/javascript"
src="index_htm_files/jquery.min.js">
</script>
<script type="text/javascript"
src="index_htm_files/imagepanner.js">
</script>
Select the magenta rectangle then open the Placeholder dialog
(Website Properties). Click inside the Replace with HTML Code text
entry window and paste the script (Edit > Paste or Ctrl v). Press APPLY.
If you have not already done so, move your placeholders off the page.
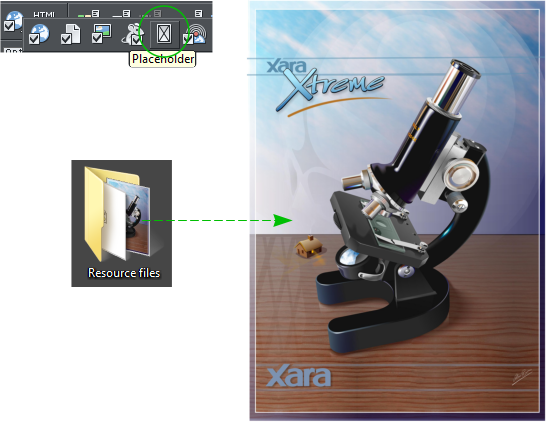
The CONTAINER: Drag’n’drop my-image.jpg from the Resource Files
folder onto the page. Resize the image to 300 x 421 pixels.
Create a magenta placeholder and add the text <head> and group the
text with the rectangle. With the magenta rectangle selected, click the
Names yellow tag icon on the Infobar. Key in <head> in the Apply
Name: text entry box and press Add. Include the angle brackets <> This
adds the placeholder script to the HEAD portion of the HTML document.
Highlight the text shown below and copy it to the clipboard (Ctrl c).
<style type="text/css">
/*Default CSS for pan containers*/
.pancontainer{
position:relative; /*keep this intact*/
overflow:hidden; /*keep this intact*/
border:5px solid white;
}
</style>
<script type="text/javascript"
src="index_htm_files/jquery.min.js">
</script>
<script type="text/javascript"
src="index_htm_files/imagepanner.js">
</script>
Select the magenta rectangle then open the Placeholder dialog
(Website Properties). Click inside the Replace with HTML Code text
entry window and paste the script (Edit > Paste or Ctrl v). Press APPLY.
If you have not already done so, move your placeholders off the page.
The CONTAINER: Drag’n’drop my-image.jpg from the Resource Files
folder onto the page. Resize the image to 300 x 421 pixels.
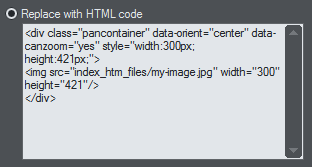 This colour version will be our zoom container placeholder for the
zooming hi-resolution image, so select the high resolution image, copy
the script below, and paste the code in the Placeholder > Replace with
HTML Code: text entry box. Press APPLY.
<div class="pancontainer" data-orient="center" data-canzoom="yes"
style="width:300px; height:421px;">
<img src="index_htm_files/my-image.jpg" width="300"
height="421"/>
</div>
The text in green is the dimensions of the scaled placeholder you
created from the image. If you use a different image change the
dimensions as needed.
H 1 2 3 4 Download Zipped Tutorial
This colour version will be our zoom container placeholder for the
zooming hi-resolution image, so select the high resolution image, copy
the script below, and paste the code in the Placeholder > Replace with
HTML Code: text entry box. Press APPLY.
<div class="pancontainer" data-orient="center" data-canzoom="yes"
style="width:300px; height:421px;">
<img src="index_htm_files/my-image.jpg" width="300"
height="421"/>
</div>
The text in green is the dimensions of the scaled placeholder you
created from the image. If you use a different image change the
dimensions as needed.
H 1 2 3 4 Download Zipped Tutorial