 WEBSITE AND WEBSITE GRAPHICS CREATED WITH XARA DESIGNER 6 PRO


 This tutorial has been adapted from Simple Image Panner and Zoomer
from Dynamic Drive. It shows you how to create a zoom and panning
effect photo. And the hardest part has already been done for you.
This tutorial has been adapted from Simple Image Panner and Zoomer
from Dynamic Drive. It shows you how to create a zoom and panning
effect photo. And the hardest part has already been done for you.
 XU-oomer Resource File
To save you the trouble of writing your own javascript, I have included
all the necessary files in a ZIP file. Click here to download the ZIP file.
Create a new folder on your desktop and unzip these files into the new
folder. Name the folder Resource Files.
Below you will find a list of placeholders that you will create for this
tutorial. Create each of the placeholder rectangles and add the text
shown then group the text with each placeholder.
IMPORTANT: After you key in the text for each of the placeholders,
be sure to press Apply. You must do this for each placeholder
image you create.
Move the placeholders onto the pasteboard as you create each one.
Create your first placeholder rectangle (shown in pale blue). Add the
text to the placeholder “Link to imagepanner.js” Group the text and
the rectangle. The size of the rectangle is not important. The
placeholder color is also arbitrary. You may use any color you like.
With the placeholder selected, click the Link icon to open the Link
Properties dialog. In the Link to File (PDF, AVI, etc.) dialog, Browse to
the Resource Files folder on your desktop and select imagepanner.js
Click Open and then press APPLY.
Create another placeholder rectangle. Add the text Link to
jquery.min.js
With the placeholder selected, click the Link icon to open the Link
Properties dialog. In the Link to File (PDF, AVI, etc.) browse to the file
jquery.min.js Click Open and then press APPLY.
XU-oomer Resource File
To save you the trouble of writing your own javascript, I have included
all the necessary files in a ZIP file. Click here to download the ZIP file.
Create a new folder on your desktop and unzip these files into the new
folder. Name the folder Resource Files.
Below you will find a list of placeholders that you will create for this
tutorial. Create each of the placeholder rectangles and add the text
shown then group the text with each placeholder.
IMPORTANT: After you key in the text for each of the placeholders,
be sure to press Apply. You must do this for each placeholder
image you create.
Move the placeholders onto the pasteboard as you create each one.
Create your first placeholder rectangle (shown in pale blue). Add the
text to the placeholder “Link to imagepanner.js” Group the text and
the rectangle. The size of the rectangle is not important. The
placeholder color is also arbitrary. You may use any color you like.
With the placeholder selected, click the Link icon to open the Link
Properties dialog. In the Link to File (PDF, AVI, etc.) dialog, Browse to
the Resource Files folder on your desktop and select imagepanner.js
Click Open and then press APPLY.
Create another placeholder rectangle. Add the text Link to
jquery.min.js
With the placeholder selected, click the Link icon to open the Link
Properties dialog. In the Link to File (PDF, AVI, etc.) browse to the file
jquery.min.js Click Open and then press APPLY.

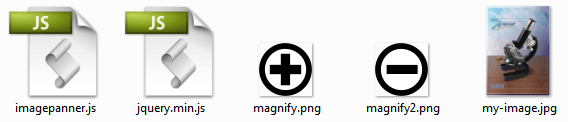
 Create two pale green placeholder rectangles. Add the text Link to
magnify.png and Link to magnify2.png. Group each rectangle to the
appropriate text.
With the placeholder selected, link the green rectangles to the
appropriate png files in the Resource File folder. Click Open and then
press APPLY for each link.
Create two pale green placeholder rectangles. Add the text Link to
magnify.png and Link to magnify2.png. Group each rectangle to the
appropriate text.
With the placeholder selected, link the green rectangles to the
appropriate png files in the Resource File folder. Click Open and then
press APPLY for each link.
 Create a blue square placeholder rectangle. Add the text Link to my-
image.jpg and HiRes photo or illustration. This last bit of text is a
reminder in case you want to use another image.
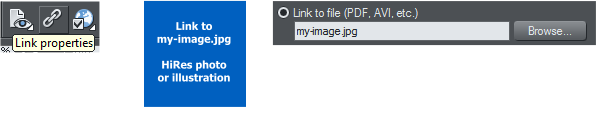
With the placeholder selected, link the blue rectangle to the file
my-image.jpg in the Resource file folder. Click Open then press APPLY.
Before you go any further, and with the Link Properties dialog open,
select each of your placeholders and make sure each placeholder is
linked to the appropriate file.
H 1 2 3 4 Download Zipped Tutorial
Create a blue square placeholder rectangle. Add the text Link to my-
image.jpg and HiRes photo or illustration. This last bit of text is a
reminder in case you want to use another image.
With the placeholder selected, link the blue rectangle to the file
my-image.jpg in the Resource file folder. Click Open then press APPLY.
Before you go any further, and with the Link Properties dialog open,
select each of your placeholders and make sure each placeholder is
linked to the appropriate file.
H 1 2 3 4 Download Zipped Tutorial