


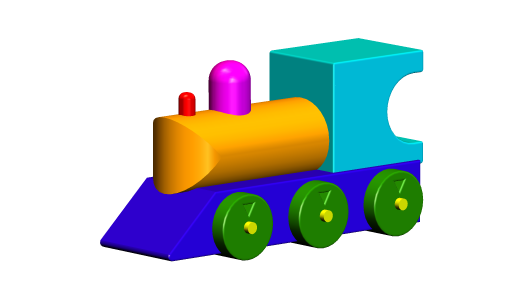
 Xara 3D is known for its ability to take text and symbols and to create
impressive 3D animations. But what’s not so well known is with a small
bit of effort and imagination, you can create some pretty interesting
and complex objects, such as the wooden toy train shown below, which
as it so happens is the subject of this Guest Tutorial.
Xara 3D is known for its ability to take text and symbols and to create
impressive 3D animations. But what’s not so well known is with a small
bit of effort and imagination, you can create some pretty interesting
and complex objects, such as the wooden toy train shown below, which
as it so happens is the subject of this Guest Tutorial.
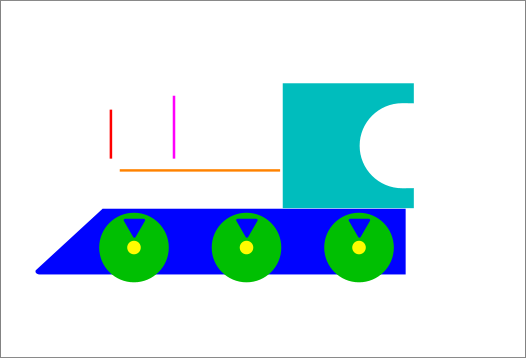
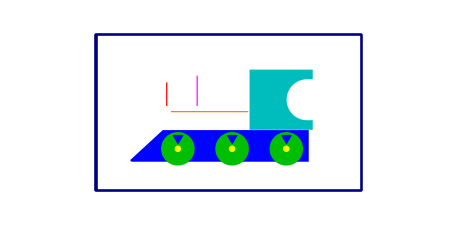
 In this tutorial, we will turn some very simple vector shapes into this
toy train. You will need a vector drawing program, Xara Xtreme, Xara
Designer or Xara Photo and Graphics Designer will work fine as will
previous versions of Xara such as Xara X, etc. And you will need a copy
of Xara 3D Maker 7. If you do not already have Xara 3D Maker 7 you
can download a free 30 day trial copy here.
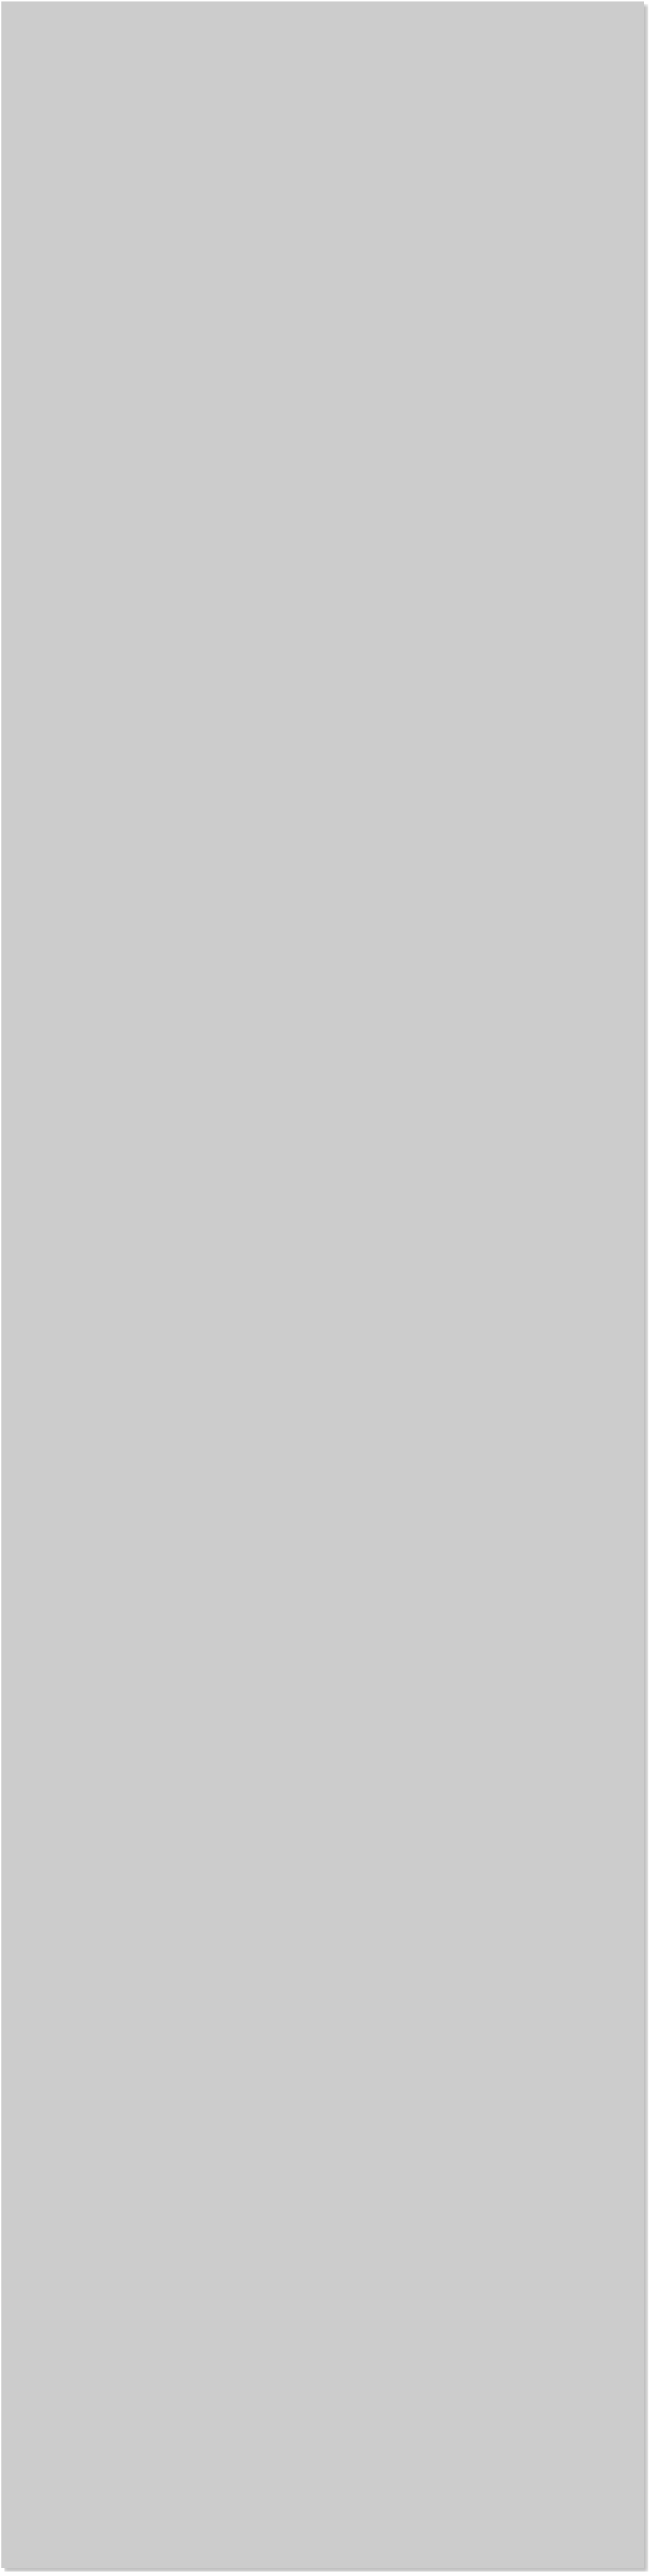
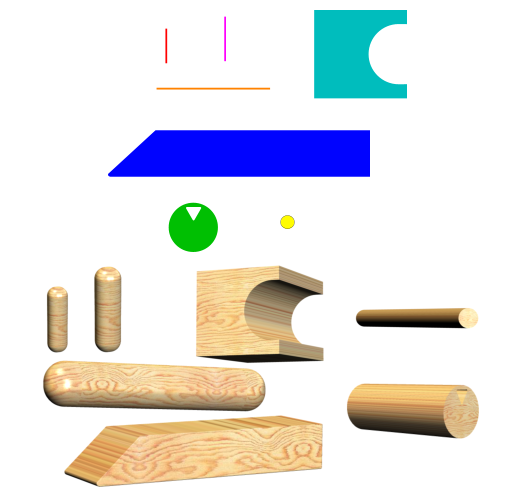
Shown above top are the basic vector shapes created in Xara Photo &
Graphic Designer 6 (or similar software application) and below the
simple shapes are the results of extruding these shapes in Xara 3D with
the wood texture added along with the bevel styles.
Three of the vector shapes look like thin lines and nothing like the
round cylinder shapes as they will be in 3D. Well give these 3 shapes a
large round bevel to fatten them up into cylinders in Xara 3D Maker 7.
In this tutorial, we will turn some very simple vector shapes into this
toy train. You will need a vector drawing program, Xara Xtreme, Xara
Designer or Xara Photo and Graphics Designer will work fine as will
previous versions of Xara such as Xara X, etc. And you will need a copy
of Xara 3D Maker 7. If you do not already have Xara 3D Maker 7 you
can download a free 30 day trial copy here.
Shown above top are the basic vector shapes created in Xara Photo &
Graphic Designer 6 (or similar software application) and below the
simple shapes are the results of extruding these shapes in Xara 3D with
the wood texture added along with the bevel styles.
Three of the vector shapes look like thin lines and nothing like the
round cylinder shapes as they will be in 3D. Well give these 3 shapes a
large round bevel to fatten them up into cylinders in Xara 3D Maker 7.
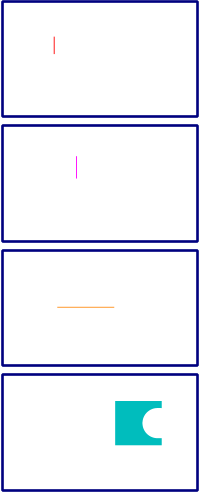
 This is an illustration of each vector shape according to size and
position relative to each other. You can use this as a guide.
You will need to either duplicate these shapes in your vector graphics
editor. I have colour coded each vector shape for your guidance only.
You will not need to colour them. Xara 3D Maker 7 will not use the
colours, only the shapes, or click here for a XAR file with the shapes.
This is an illustration of each vector shape according to size and
position relative to each other. You can use this as a guide.
You will need to either duplicate these shapes in your vector graphics
editor. I have colour coded each vector shape for your guidance only.
You will not need to colour them. Xara 3D Maker 7 will not use the
colours, only the shapes, or click here for a XAR file with the shapes.
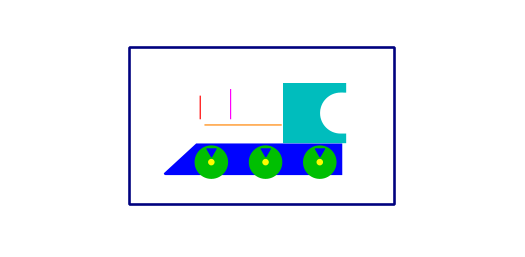 Once you have created each shape and positioned them similar to the
way I have shown, you will need to draw a rectangle around them. This
rectangle is a ‘sizing frame’ that will be used by Xara 3D to position and
register each shape relative to each other shapes. This ‘sizing frame’
takes advantage of the fact that Xara 3D does not recognise lines (only
shapes) and that very thin shapes are not displayed even though they
are still recognised. Draw a simple rectangle with an outline width of
just 0.001 pixels. For Xara 3D to use the frame you need to convert
this line into a shape (Arrange > Convert to Editable Shapes) in your
vector drawing program. The shape is too thin to see, so to make it
visible, give it a line width of 4 pixels.
Open Xara 3D Maker 7: Click on the Text Tool (Aa). Press Ctrl a to
select all the existing default text and press the Delete key on your
keyboard to delete the text.
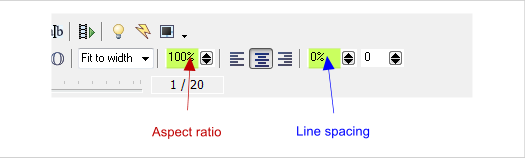
Ensure that the Aspect ratio is set to 100% and that the Line spacing is
set to 0%.
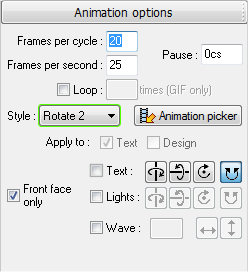
Click the Animation Options button and select Rotate 2.
Now we’re ready to copy the shapes from the vector application (Xara
Designer for example), and paste them into Xara 3D Maker 7. One by
one, copy one shape and the sizing rectangle to the clipboard (Edit >
Copy). And using the next step, paste the shape and sizing rectangle
into Xara 3D Maker 7.
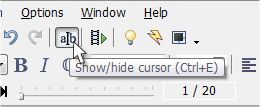
In Xara 3D Maker 7, enable Show/Hide Cursor so we can clearly see
what we are doing.
IMPORTANT: Each time, after you paste a shape and rectangle
into Xara 3D, hold down the Shift key and press Enter. This
returns the cursor back to the previous position in front of the
last pasted shape. And will ensure all the shapes align properly.
NOTE: My friend Gary got very confused and wrote to me in a
panic asking how to get everything to align properly. This is what
the sizing rectangle is for. It automatically puts all of the pieces
in the right place.
TIP: It will make it easier if you make all of your shapes and
resizing rectangle larger. I did this for you in my Basic Shapes
XAR file.
Once you have created each shape and positioned them similar to the
way I have shown, you will need to draw a rectangle around them. This
rectangle is a ‘sizing frame’ that will be used by Xara 3D to position and
register each shape relative to each other shapes. This ‘sizing frame’
takes advantage of the fact that Xara 3D does not recognise lines (only
shapes) and that very thin shapes are not displayed even though they
are still recognised. Draw a simple rectangle with an outline width of
just 0.001 pixels. For Xara 3D to use the frame you need to convert
this line into a shape (Arrange > Convert to Editable Shapes) in your
vector drawing program. The shape is too thin to see, so to make it
visible, give it a line width of 4 pixels.
Open Xara 3D Maker 7: Click on the Text Tool (Aa). Press Ctrl a to
select all the existing default text and press the Delete key on your
keyboard to delete the text.
Ensure that the Aspect ratio is set to 100% and that the Line spacing is
set to 0%.
Click the Animation Options button and select Rotate 2.
Now we’re ready to copy the shapes from the vector application (Xara
Designer for example), and paste them into Xara 3D Maker 7. One by
one, copy one shape and the sizing rectangle to the clipboard (Edit >
Copy). And using the next step, paste the shape and sizing rectangle
into Xara 3D Maker 7.
In Xara 3D Maker 7, enable Show/Hide Cursor so we can clearly see
what we are doing.
IMPORTANT: Each time, after you paste a shape and rectangle
into Xara 3D, hold down the Shift key and press Enter. This
returns the cursor back to the previous position in front of the
last pasted shape. And will ensure all the shapes align properly.
NOTE: My friend Gary got very confused and wrote to me in a
panic asking how to get everything to align properly. This is what
the sizing rectangle is for. It automatically puts all of the pieces
in the right place.
TIP: It will make it easier if you make all of your shapes and
resizing rectangle larger. I did this for you in my Basic Shapes
XAR file.
 Copy one shape and sizing
rectangle at a time and
paste each into Xara 3D
Maker 3D.
Copy one shape and sizing
rectangle at a time and
paste each into Xara 3D
Maker 3D.