Creating a soft, airbrushed image
by Newton Florentino
 I always start a face illustration with the
eyes. After that, I do the mouth and nose. Then I shape the face. And then I start giving the face volume. I always start a face illustration with the
eyes. After that, I do the mouth and nose. Then I shape the face. And then I start giving the face volume.
Some people start by shaping the face and
after that they center the eyes, mouth, and nose. Both ways work fine. It is just a matter of what method you are
comfortable with.
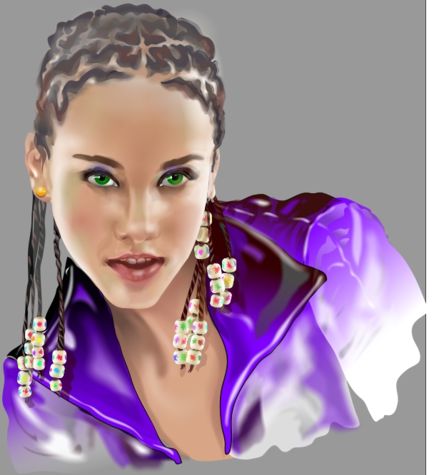
The Alicia's face tutorial is not for the beginner. The whole idea is to illustrate how I achieved the softness of the skin.
I have 15 figures on the following pages which show how I did that.
In figures 1 through 7, I use simple shapes (linear, circles, elliptical and flat) to which I apply transparency. I use flat and linear transparencies as
needed. I also use feathering.
In figures 8 through 15, I cloned the shape of the face and applied highlights around using elliptical, linear, and circular transparencies.
If you follow the steps and my notations, you should be able to achieve the same results.
Newton Florentino
|