|
|
|
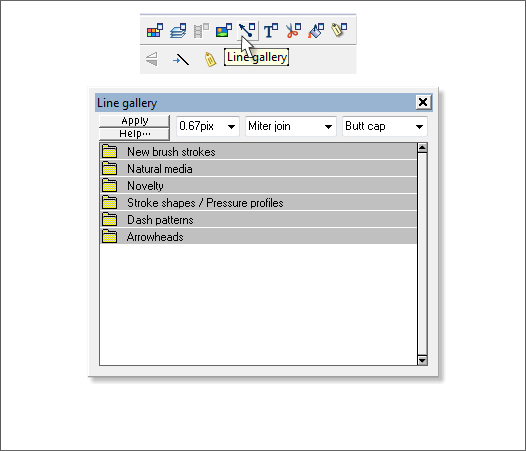
The Line Gallery is a virtual treasure chest of useful stuff. We'll look in the various folders and see what's in there and how what's in there works.
To open the Line Gallery click the Line Gallery icon on the Infobar or press F12 the keyboard shortcut. When a path or outline is selected the Apply button is enabled. If no path is selected the Apply button is grayed out. Along with the Apply and Help... buttons are three drop down lists: Line Width, Set Join Type and Set Line Cap. There are also six folders which we will cover in a moment. First we'll look at the Set Line Join and Set End Cap options.
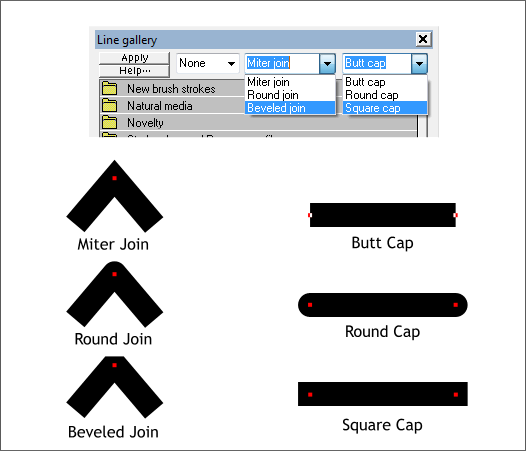
Set Join Type applies to how paths are joined together. This only affects a control point that is between two line segments. The default is Miter Join shown above left. This produces a hard pointed angle. Sometimes a softer join is preferable, and Round Join produces a soft rounded edge. Beveled Join is similar to Round Join in as much as it produces a less pointed (but less attractive) join. The only time I use Bevel Join is on a portion of a drawing with a lot small line segments that are causing a lot of pointy edges. These segments are so small as to be barely visible and Bevel Join makes the joins cleaner. Round Join works in this situation as well. Set Line Caps works with the end of the line as shown above on the right. It affects not only the shape of end of a line but also whether the line ends at the control point or extends half the width of the line beyond. Round Cap is self explanatory. But as you can see the difference between Butt Cap and Square Cap is the location of the control point. Is it just me, or does Butt Cap conjure a strange image of an improbably weird article of apparel?
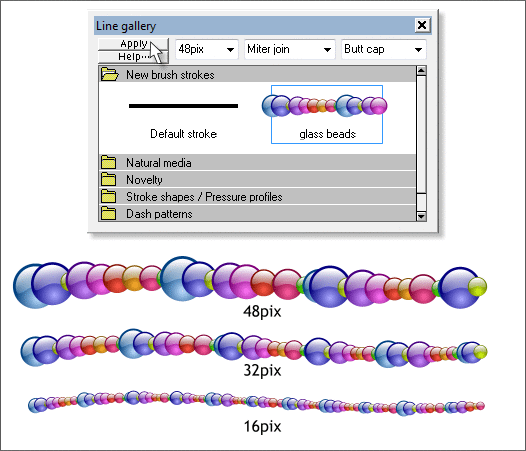
If you open a file with a custom brush stroke, or create your own custom brush stroke, (there are several tutorials for creating a custom brush - see Brushes in the Workbook Index) the brushes appear in the Select an Existing Brush drop down list on the Freehand and Brush Tool Infobar. They also appear in the first Line Gallery folder New Brush Strokes. To apply a brush stroke, select a path or outline, select a brush stroke, and press Apply. The brushes change as the size changes as shown above. If you have Scale Line Widths enabled, a custom brush stroked path will scale proportionately. If Scale Line Widths is disabled, then the brush objects will remain the same size. See Scale Line Widths on Page 1. TIP(S): You can copy a custom brush stroke to the clipboard and use Paste Attributes (Edit menu) to apply the same stroke to any selected path. If you Convert Line to Shape (Arrange menu) and then Arrange > Ungroup, all the elements of the brush stroke become separate objects.
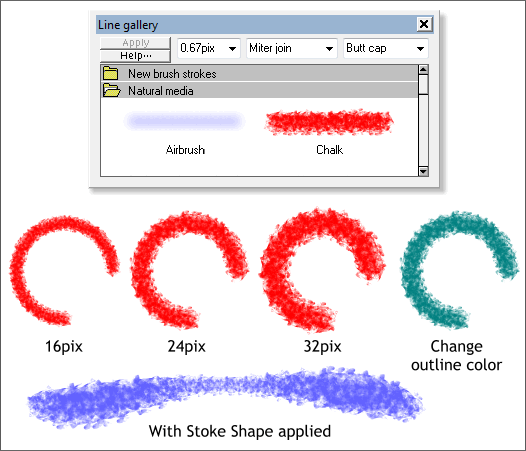
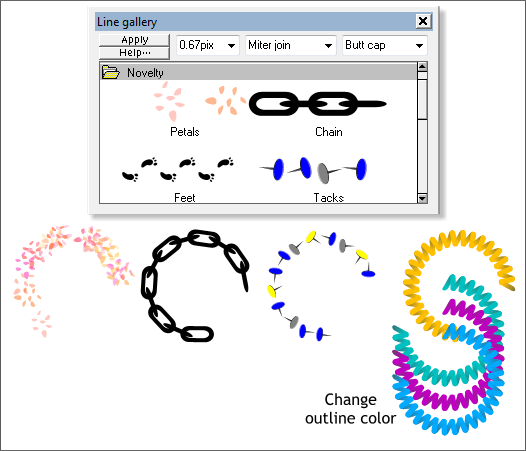
The next folder in the Line Gallery is Natural Media, a collection of brushes that mimic traditional materials such as chalk and airbrush as shown above. The brush size changes with the Width of the path. You can change the brush color by changing the Outline color by right clicking on a color on the screen palette or in the Color Editor (Ctrl e) Local Line edit mode. Custom Brush Strokes, Novelty, and Natural Media brushes can also have a Stroke Shape (Stroke Shapes are covered below) added to the stroke as shown on the bottom of the example above. TIP: You can also edit any of the aforementioned in the Freehand and Brush Tool Infobar, Edit Brush dialog where spacing, scaling, transparency, and other attributes can be edited and modified.
The Novelty folder contains a potpourri of different novel brushes. These too can be modified by changing the line color or by editing in the Edit Brush dialog. Outline Width also changes the size of the brush objects.
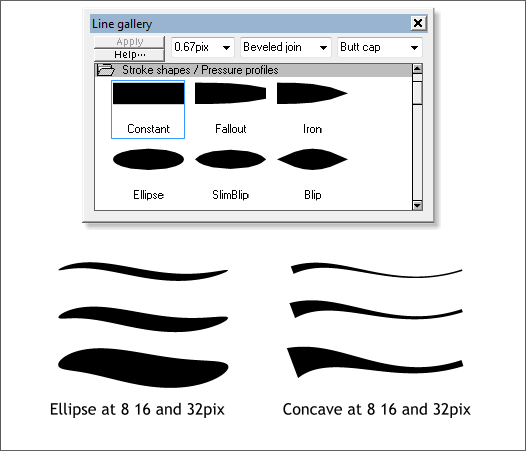
Stroke Shapes and Pressure Profiles can be applied to paths, outlines, custom brushes, novelty and natural media brushes. If you are drawing with a digital table and pen, these stroke shapes can produce a more natural looking hand drawn line. Again, the outline width affects the look of the stroke.
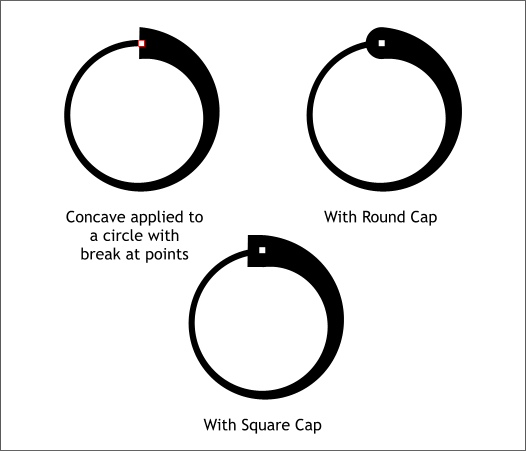
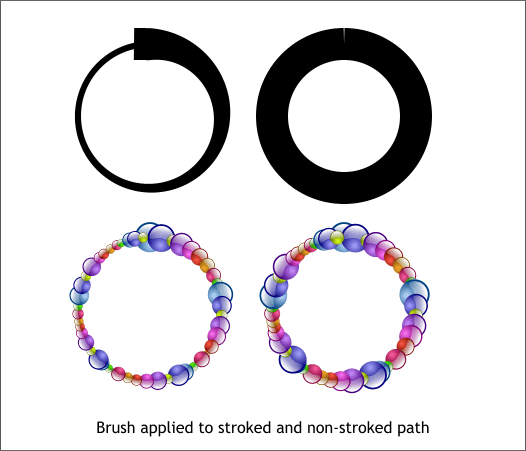
End Caps also affect a Stroke Shape as shown above. The path in the above example is a circle Converted to Editable Shapes (Arrange menu), with the top control point broken with the Shape Editor Tool Break at Point command.
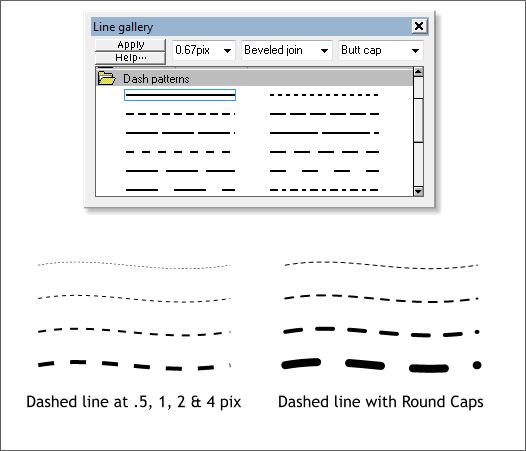
A variety of dashed patterns are found in the Dash Patterns folder. Outline Width affects the appearance and size of the dashes. A Round End Cap gives the dashed pattern a wiener-like shape in larger outline widths. TIP: If you need to create parallel lines for something like highways on a map, create a heavy line 4-8pix. Convert Line to Shape (Arrange menu). Set the fill to none and apply a outline. You can join two roads into an intersection using Arrange > Combine Shapes > Add Shapes.
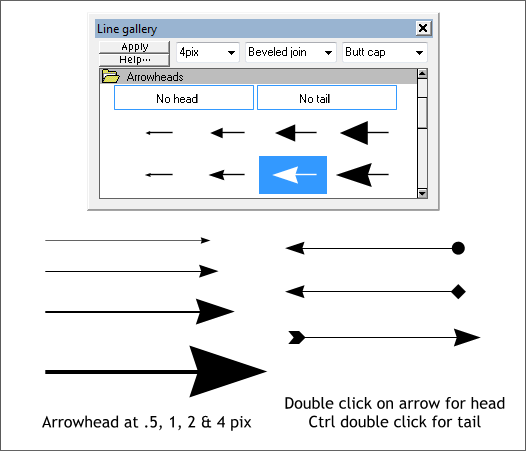
The Arrowheads folder contains arrowheads and arrow tails. Size affects the dimension of the arrow. If you have Scale Line Width enabled, the arrow will scale up and down and retain its proportion. TIP: Select a line, select an arrowhead or tail, and press Apply. Or select a line and double click on the desired arrowhead to apply the arrowhead. To apply the arrow tail, hold down the Ctrl key and double click on the desired head or tail. To remove an arrowhead or arrow tail, click No Head or No Tail text at the top of the gallery. THE TIPS NEVER STOP: If the arrowhead is on the wrong side of the arrow, with the arrow selected, switch to the Shape Editor Tool. Press the Reverse Paths arrow on the Infobar,
A Stroke Shape applied to a custom Brush Stroke changes the shape as shown above. FIN as they say at the end of French films. Your comments, questions, suggestions, and newsy gossip are always most appreciated. (I'm experimenting with the wording to see if I can get a few more responses). Please use the Send e-mail link at the bottom of this paragraph to let me know how I am doing. Gary W. Priester |
|||||||
|
|||||||
|
|
|||||||


