
|
Creating A Simple Business Card in CorelXARA 2.0 |
|
|---|---|
|
Any new software program is daunting until you learn the flow and feel of the product. The best way to learn Xara 2 is to jump right in and start a simple project. You'll become familiar with the features, and with any luck at all you'll have a successful OTB (out of box) experience in the process.
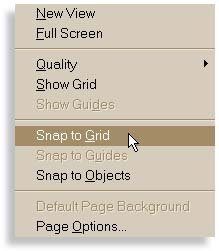
While you're here look at the other options on this menu. Snap to Guides is automatically enabled when you drag a guideline from the ruler onto the page. Can't see any rulers? Go to the Window menu, click on Bars, and select Rulers. There, that's better. Now drag a few guidelines just to get the hang of it. With Snap To Grid enabled, the guidelines will automatically snap to the grid. | |
If your rectangle is not the desired size, use the Selector Tool (the arrow) and adjust the size by dragging the center Control Handles (the little black boxes that surround the selected object or group of selected objects.) Notice how the cursor changes to reflect the tool and function selected. In this case, a cross hair symbol with a small rectangle. By default (and through no fault of your own) objects in Xara are filled with black. As black business cards are hard to read, we'll change the color of the rectangle to white. Change the fill to white by clicking the white "color well" on the screen palette with the left mouse button while the rectangle is still selected.
| |
From the Text Size drop-down list (on the overhead Property Bar) select 72 pt (points). With the G still highlighted, click on the red color well on the screen palette.
| |
©1998 Gary W. Priester
This lesson may not be copied, altered, republished or distributed in any type of media without the express written permission of the author.