 |
 |
||||
| 0 1 2 3 4 5 6 Download Zipped Tutorial | |||||
|
To finish the image we will soften the background, sharpen the girl a little, and sharpen some of the other details a bit more. There are (at least) two ways to accomplish this: either by intersecting as we have done so far ( Arrange > Combine Shapes... Intersect Shapes), or by using clip views (Arrange > Apply ClipView). You to decide which method works best for you.
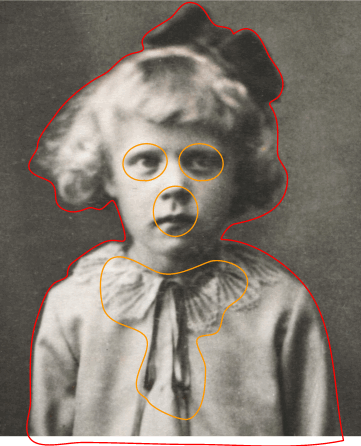
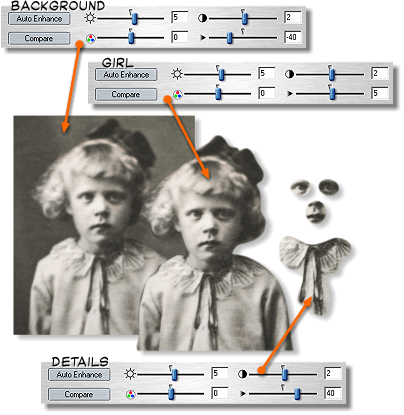
I decided to continue with intersecting. Make two clones of the bitmap copy (Ctrl k). Select the top clone and double click (or press Enter) to open the image in XPE (Xara Picture Editor ). I took the easy way and just pressed Auto Enhance to let Xara automatically do the image correction. (This works well some of the time). Change the Blur/Sharpen value to -40 to blur the cloned image. Press the red check mark to exit XPE (and accept the changes). Move the clone to back (Ctrl b). Select the next clone (the top one) and open it in XPE. Select Auto Enhance and exit XPE. Draw a shape around the girl (shown above in red outline). Select the clone you just edited and the red outline. Intersect (Combine Shapes... Intersect Shapes or Ctrl 3) and apply 4 pixels feathering to soften the edge. Move the intersected clone backwards (Shift Ctrl B). The image below shows the various settings used for the different parts in XPE.
Finally, draw some "selections" around details like the eyes and mouth. TIP: You can use one of the cloned images in the Bitmap Gallery to create these additional objects. Xara stores a copy of all your original and any modified bitmaps in the Bitmap Gallery until you close the drawing. After you close your drawing, only the bitmaps used in the drawing are saved. I also selected the front of the dress. Add shapes together. Select the bitmap copy on the top and open in XPE. Auto Enhance, change the Blur/Sharpen value to 40, and exit XPE. Intersect the bitmap copy with the shapes and apply feathering (I used 4 pixels again). NOTE: The reason we sharpen details, like the eyes and mouth, is because people tend to focus on these details first when looking at photos. And of course details that are meant to be "eye catchers" should also be sharp and clear.
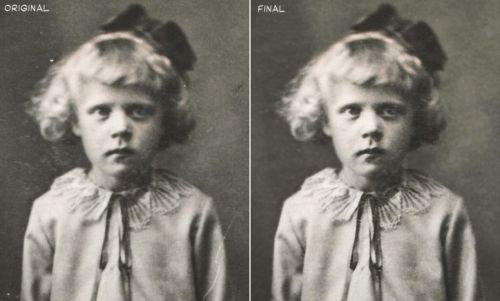
As a final step select all of the objects (there should be 3) and make a bitmap copy, and we are done. You can see the results of the editing process in the side-by-side above. Your questions and comments are welcome. Please use the feedback form on the next page to send me your thoughts. —Paul Söderholm
|
|||||
|
|
|||||


